
What if, in the 80s, music had been sold on cartridges? And what if there was a portable music player that played these cartridges? And…what if this player was made to look like a miniature boom box? These ideas got me excited enough to start this next project.
Similar to how games for consoles like Gameboy and NES where delivered to the customers on cartridges, it doesn’t seem too far fetched to think that digital music could have been distributed the same way. After all, CDs started selling as early as 1982 in Japan, coming to Europe and USA the following year.
This experiment presented a few new challenges to me. One was making something with high quality stereo output. I will need a good set of speakers, a good DAC and a good amplifier, although I don’t have any HIFI ambitions for this player. Another challenge was making a cartridge interface for connecting the music cartridges with the player circuitry. And then there was the challenge of designing this player to look like a mini boom box from the 80s (but with a design that would also work today).
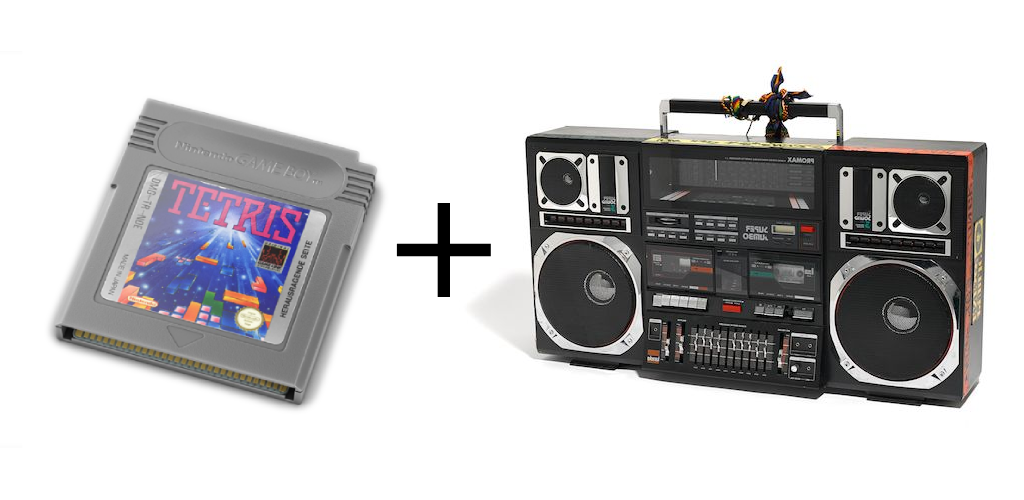
Since this is a mini Boom Box and it lends some design from portable products like the Gameboy, I decided to call it Boom Boy.
I started by designing the music cartridges, to get a direction for the visual style of the project, and to see how feasible it would be to store digital music on a PCB. First I thought that adding some memory components on the cartridge PCB would be the easiest way, but I soon realized it would probably be cheaper and faster to simply put an SD card reader on each cartridge PCB, with the SD card inside holding the music. SD card tech is cheap and widely available, as well as easy to interface with.
This is the design I came up with for the cartridge:
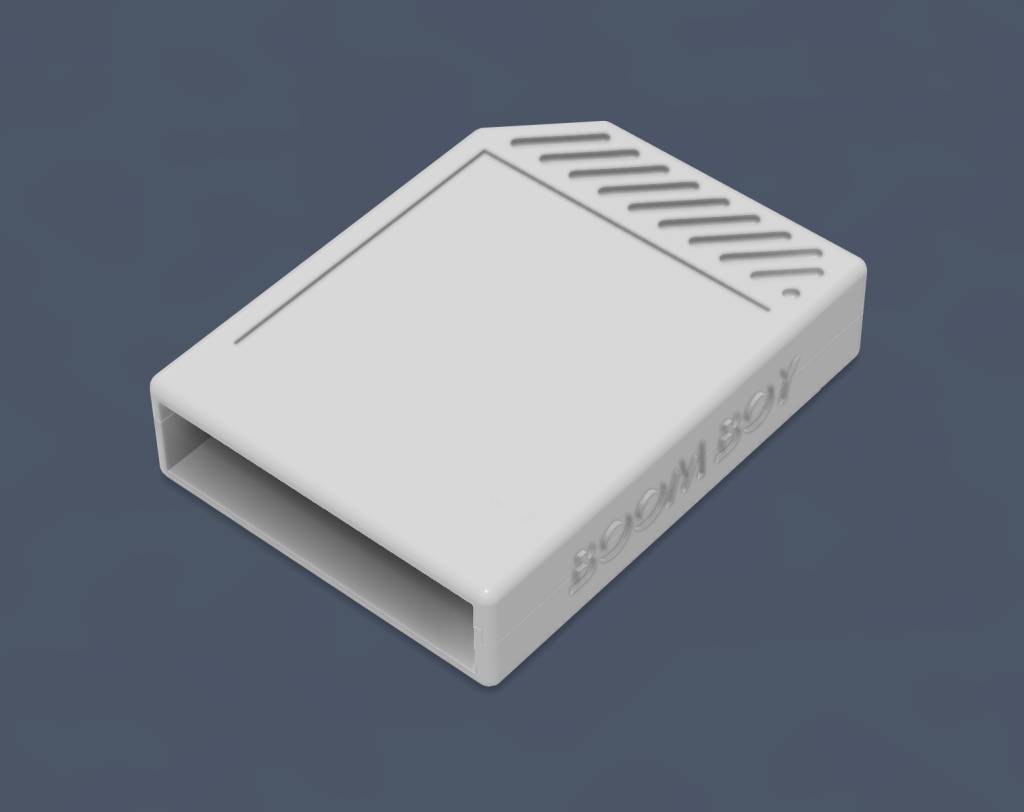
They are quite small, only 60 x 45 x 14 mm, since the music player is going to be portable. There are inset boxes on the front and top for placing labels with album art.
Looking into cartridges, I learned that the the connector seen on some of them (the part you blew on as a kid :-)) is called a PCB Edge Connector, and that it was pretty easy to add one to a PCB design. The cartridge PCB only needs to contain an SD card reader (I’m using the Adafruit 4682 MicroSD Breakout Board) and the edge connector. The design below does that and exposes the 6 leftmost pins from the SD card reader, since I will only read from it using SPI.
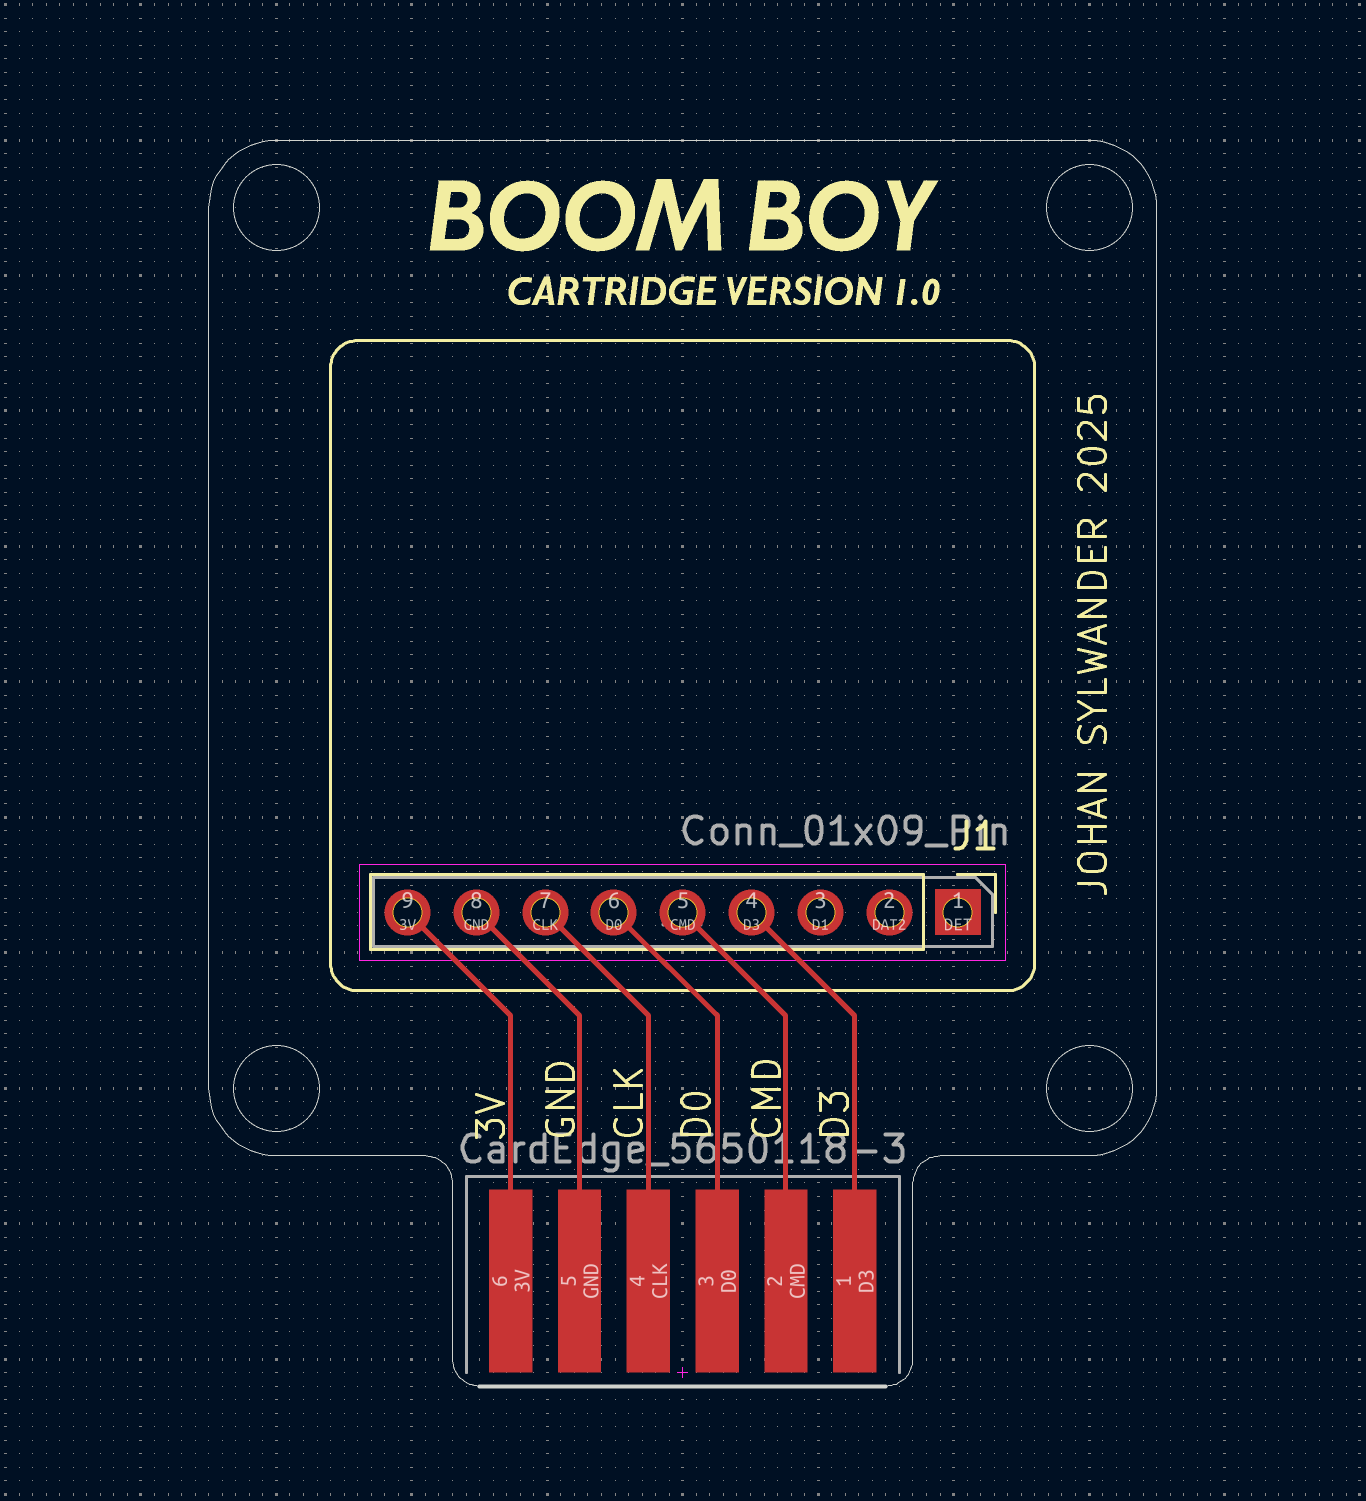
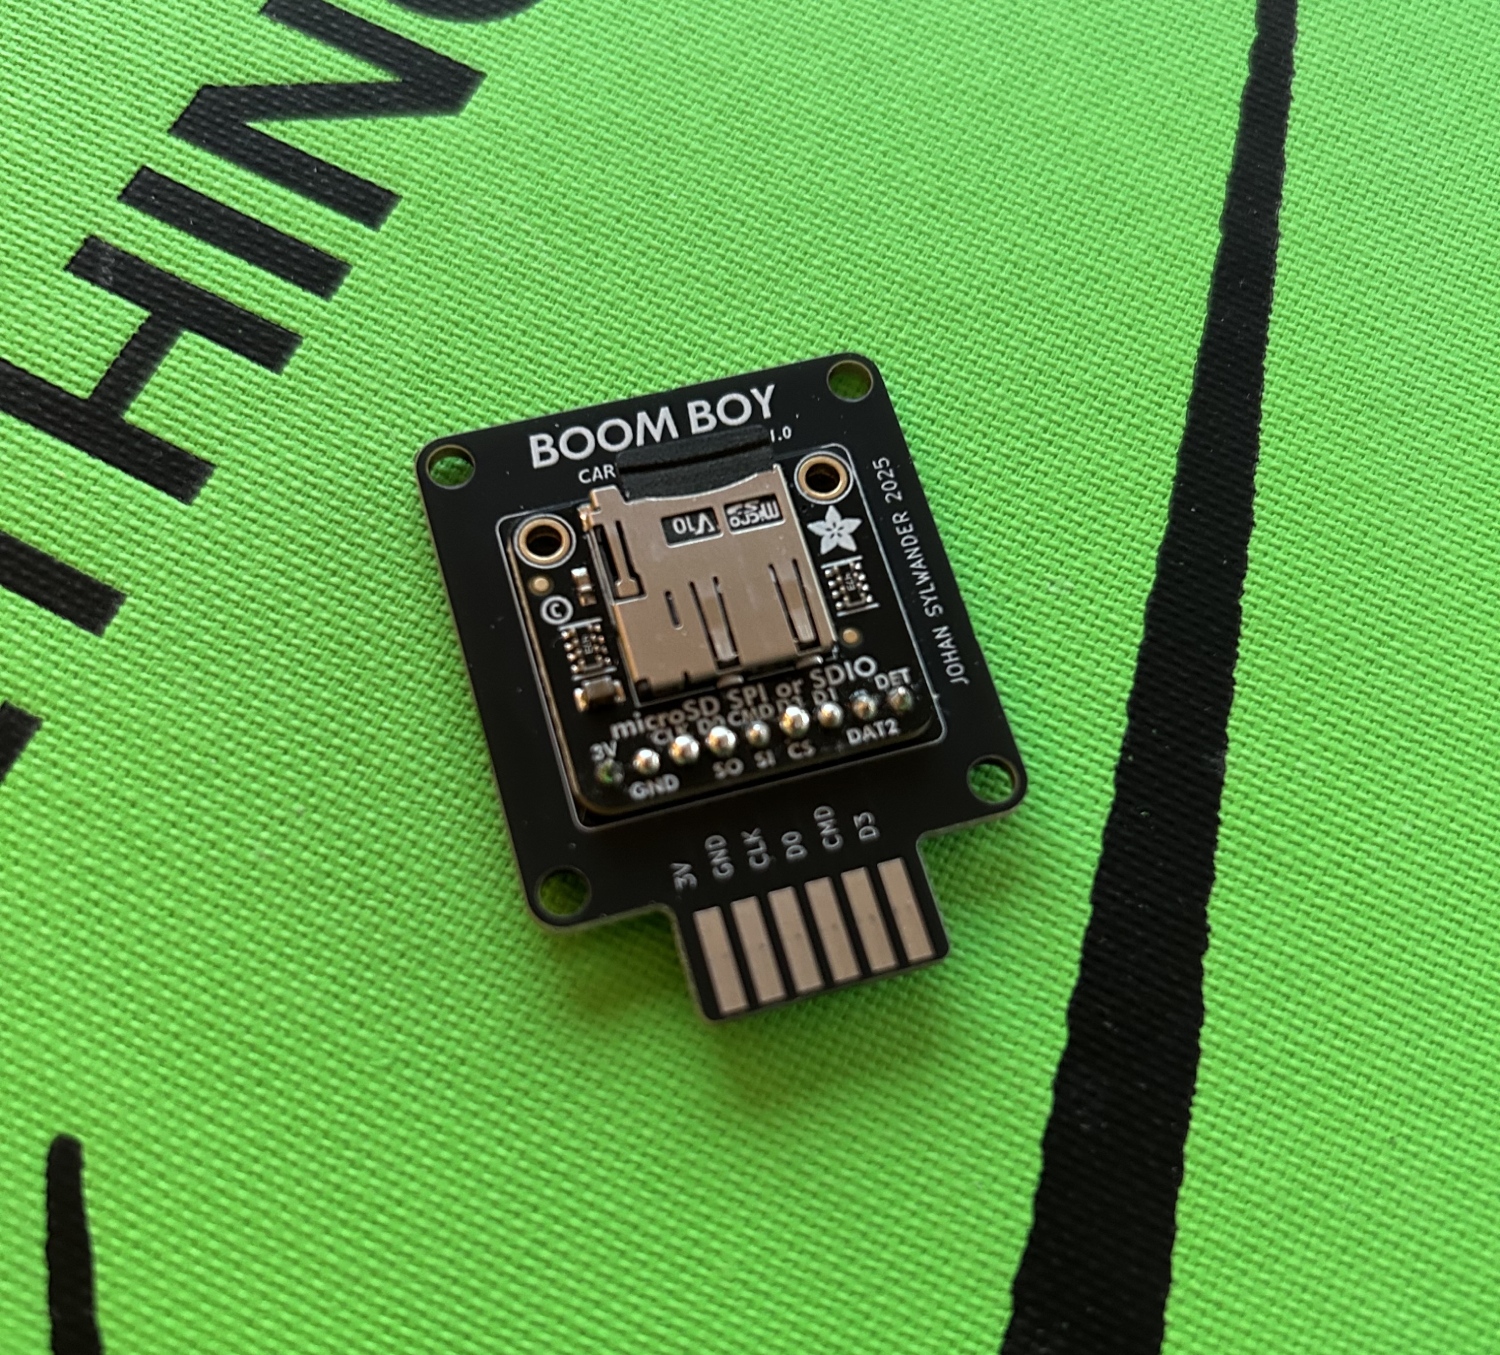
I sent this design off to JLCPCB for manufacturing and was quite happy with the results that arrived a week later. Here is a cartridge PCB with the SD card reader and SD card mounted:
Now on to the main part of the project – designing the Boom Boy itself. I wanted this to be portable enough to fit in a back pack or a large pocket, so it can’t be much longer than 15 cm and not too wide. It took a few attempts of testing different box shapes and placement of speaker elements before I landed on this design:
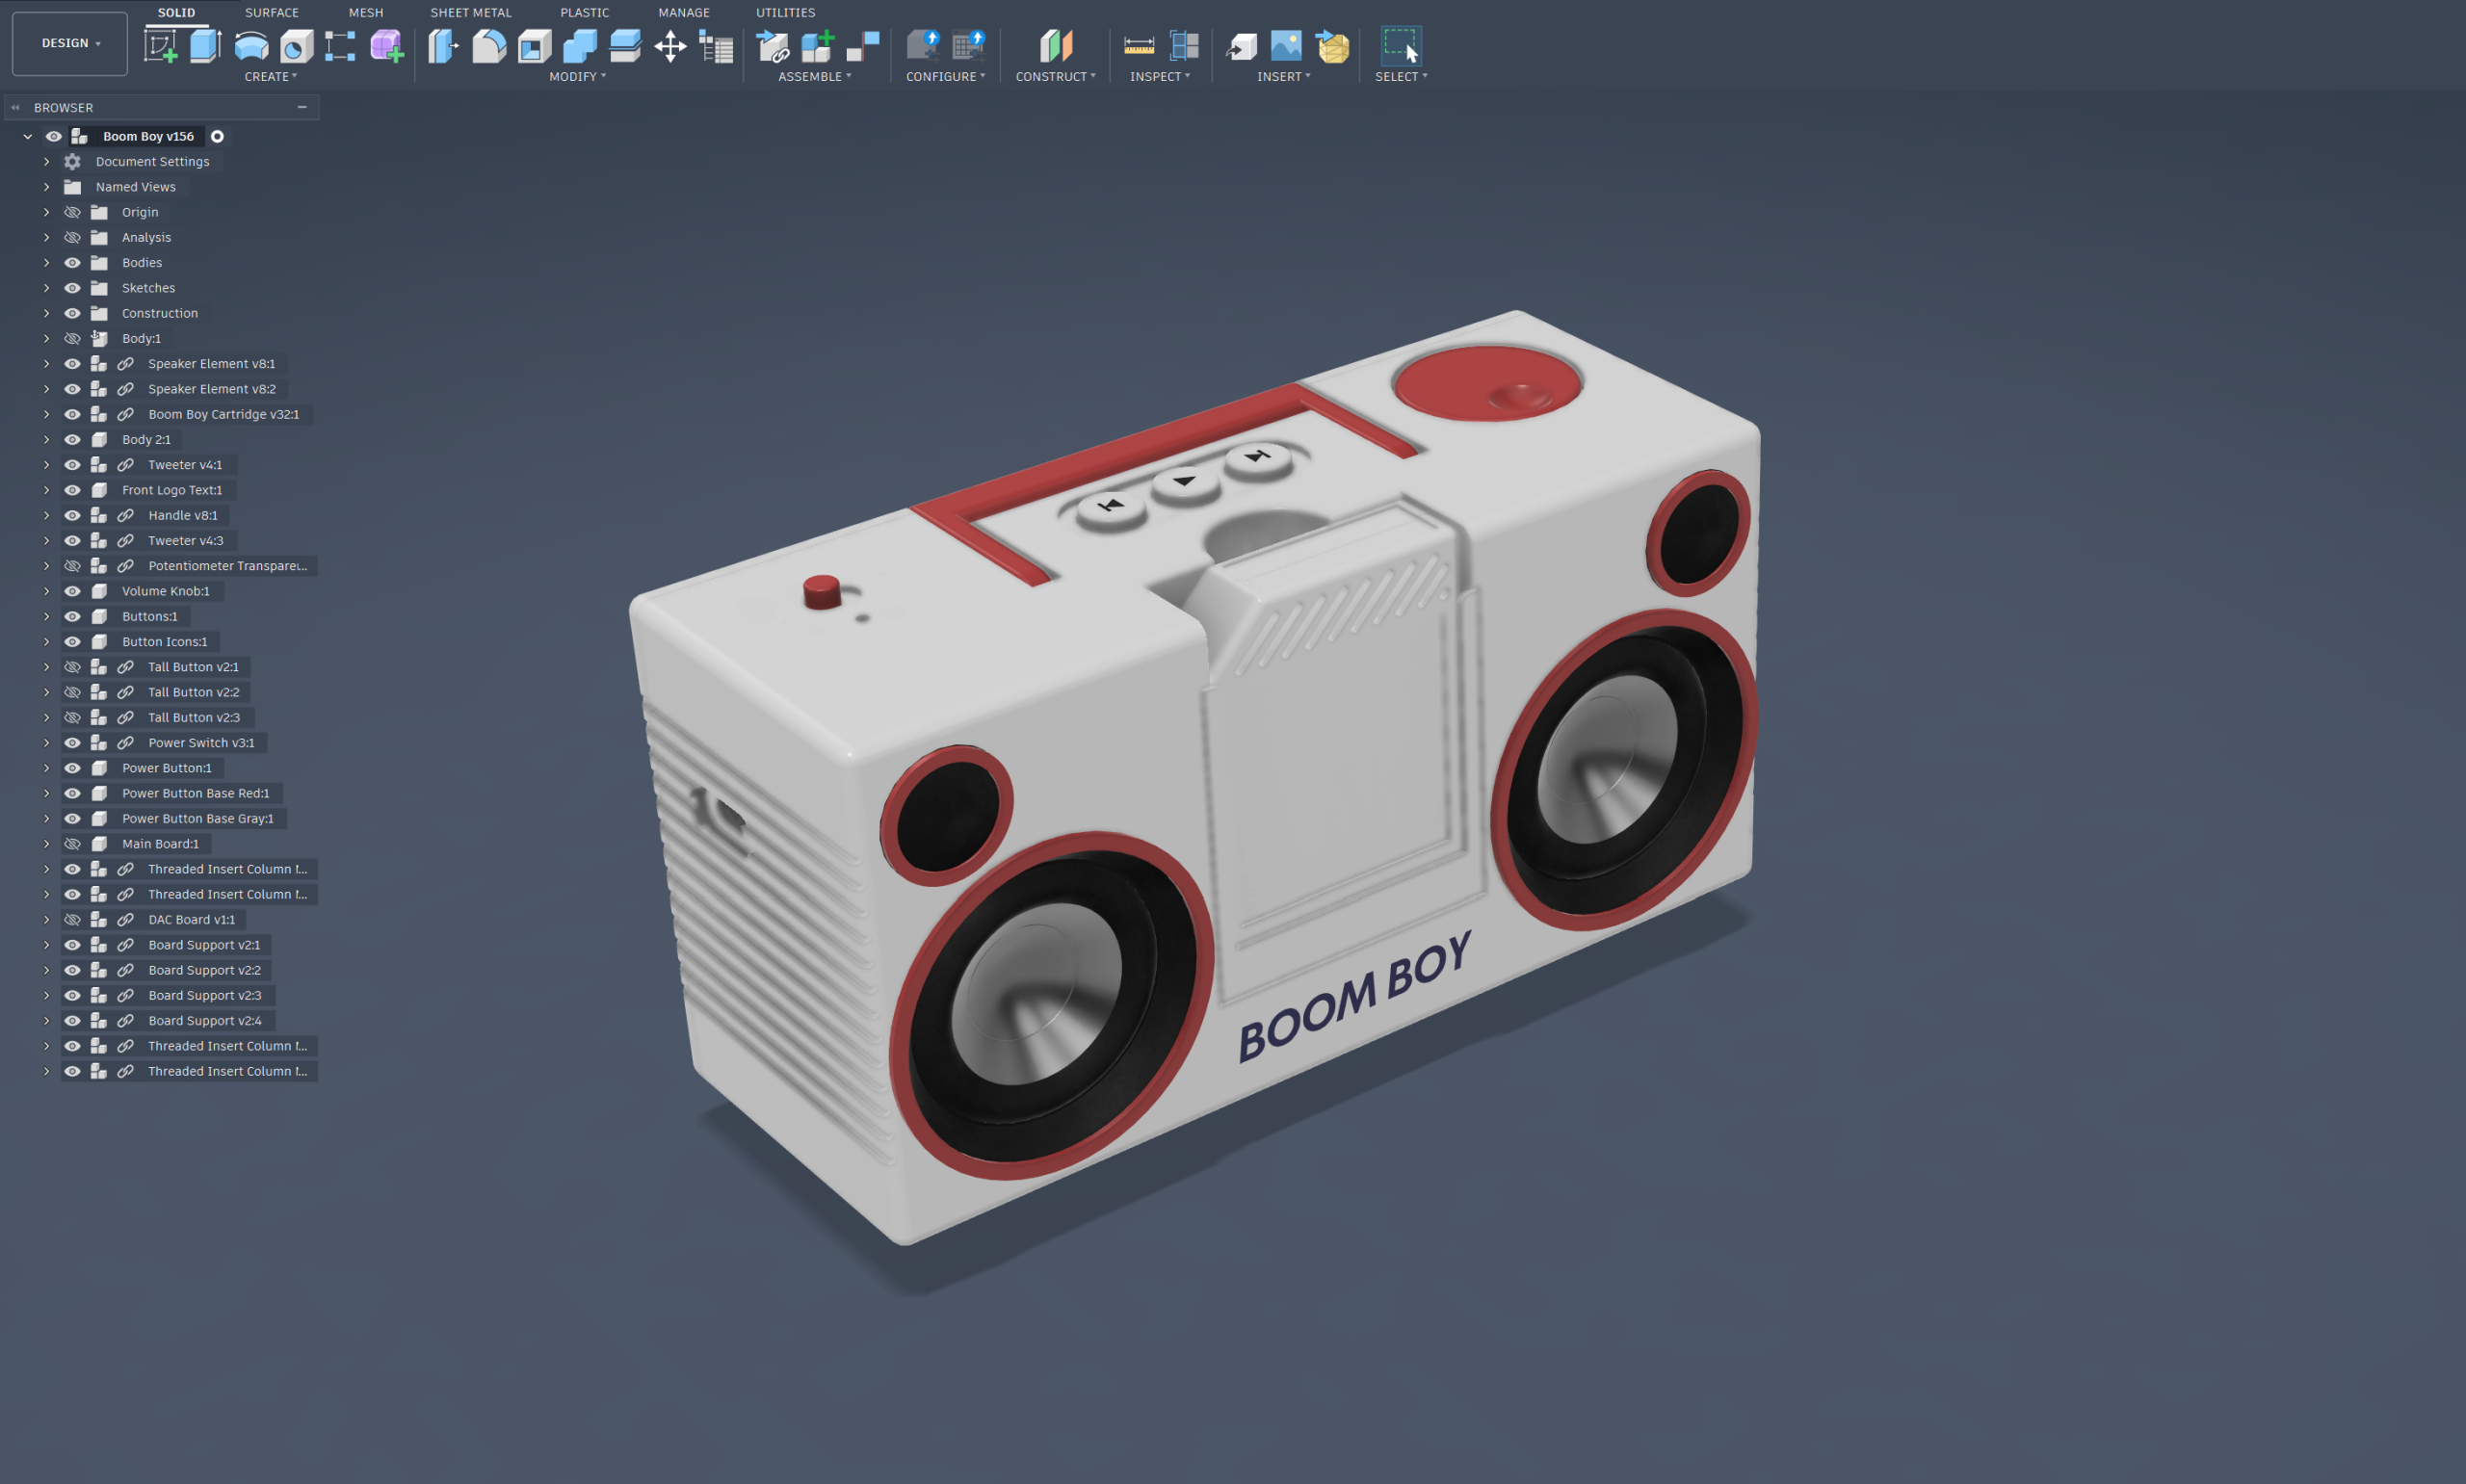
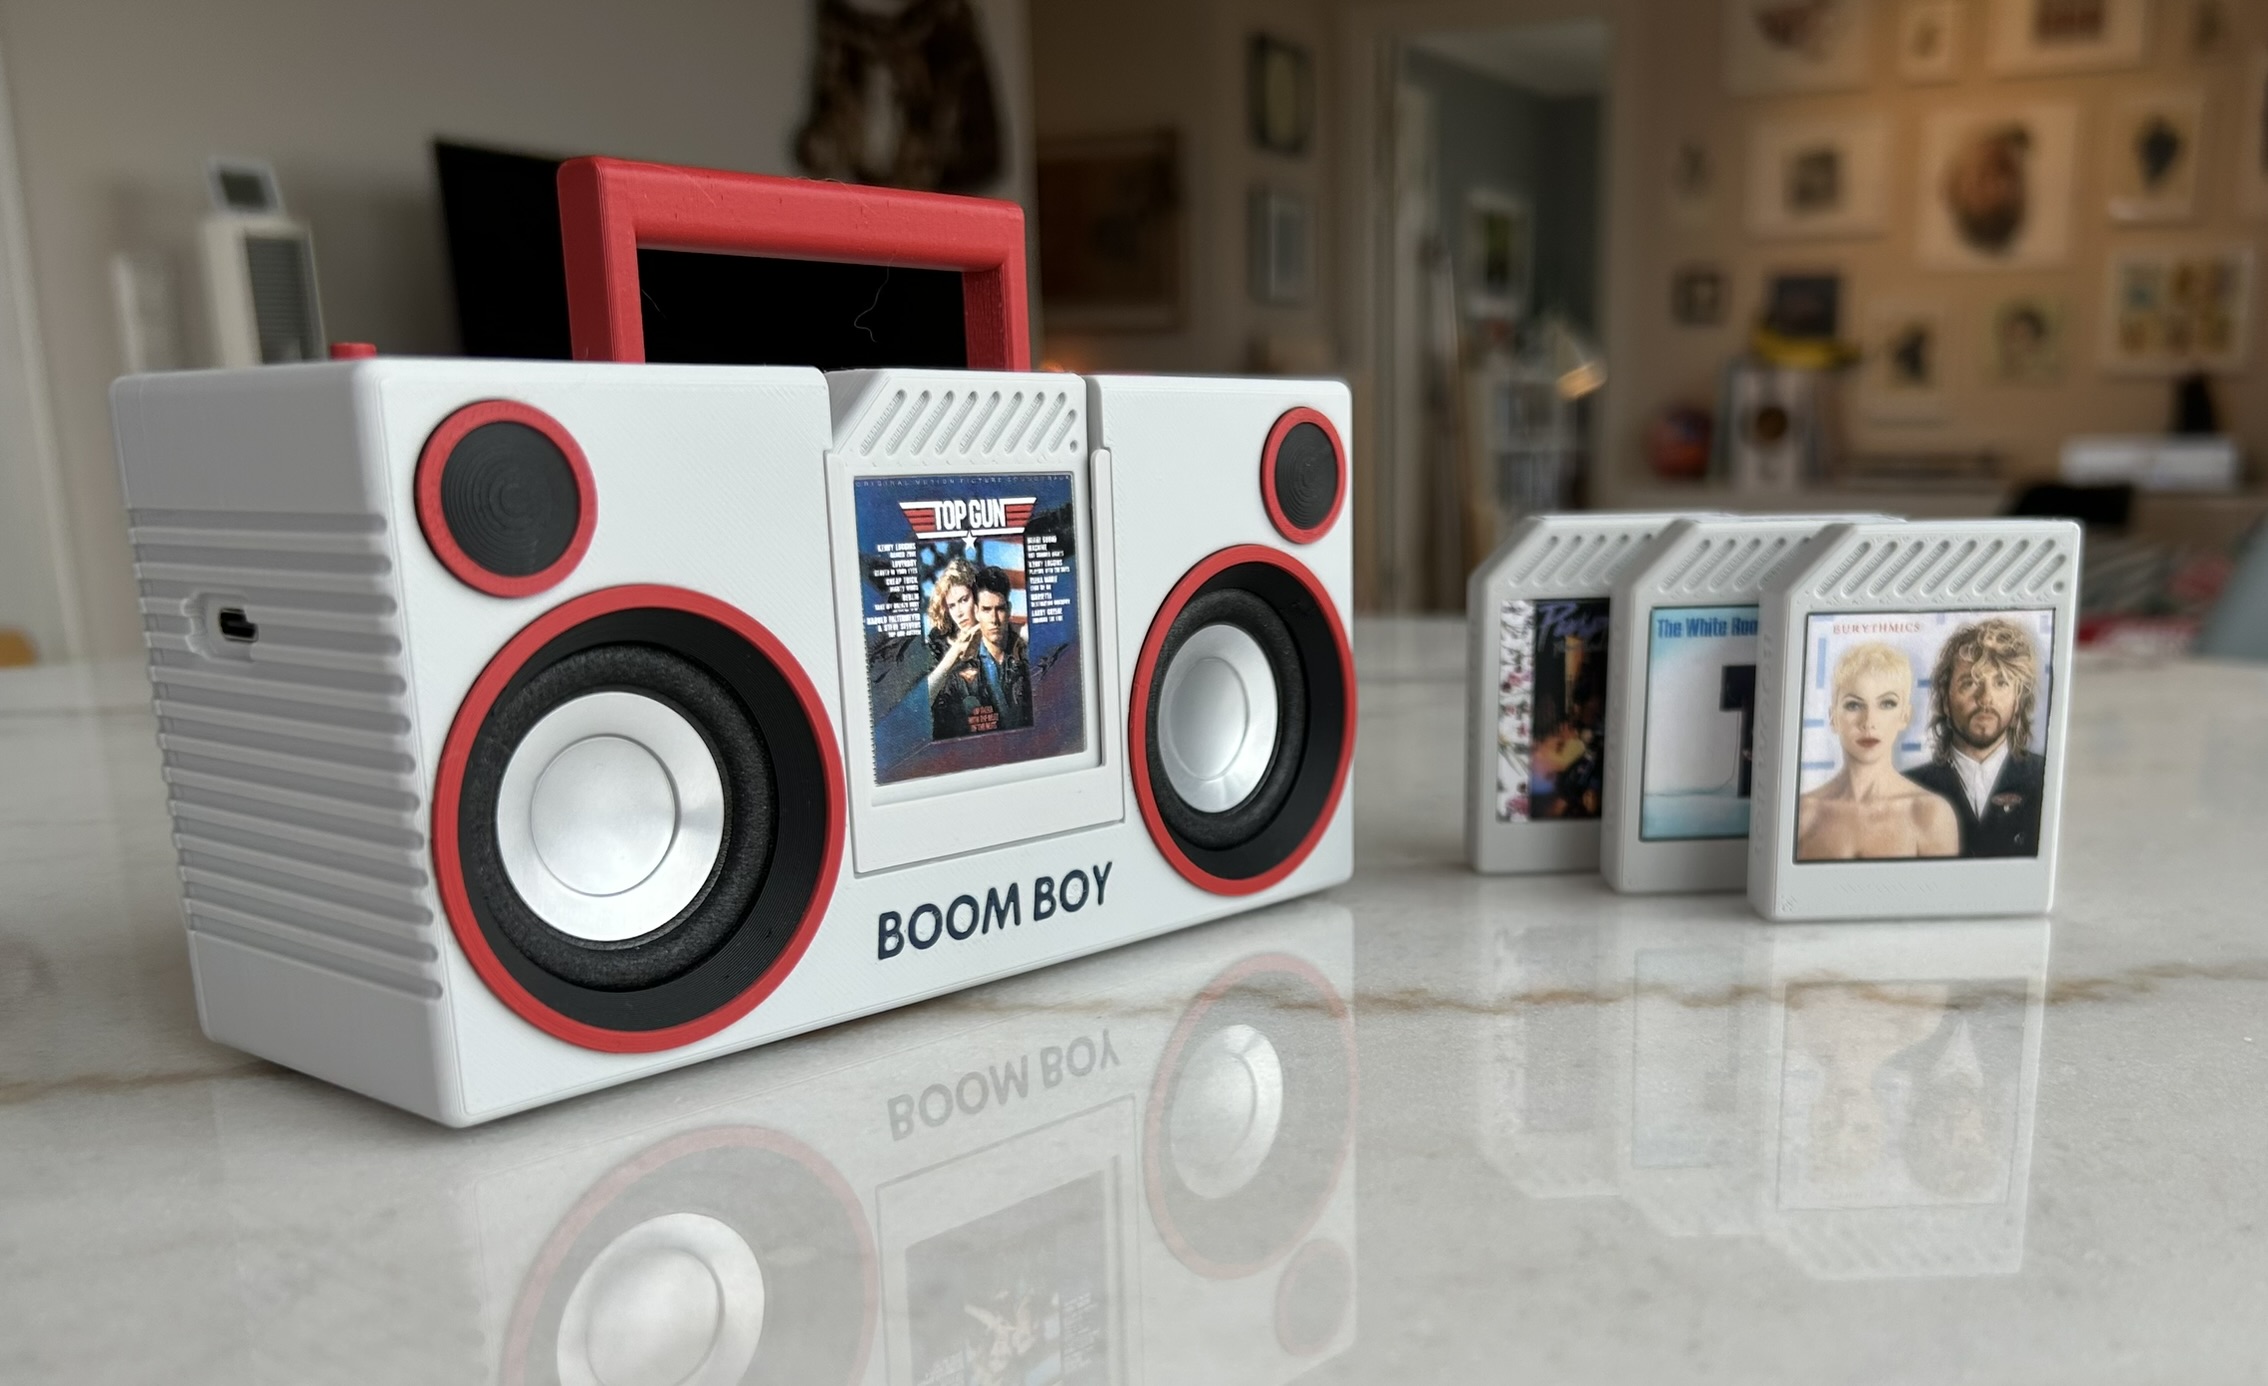
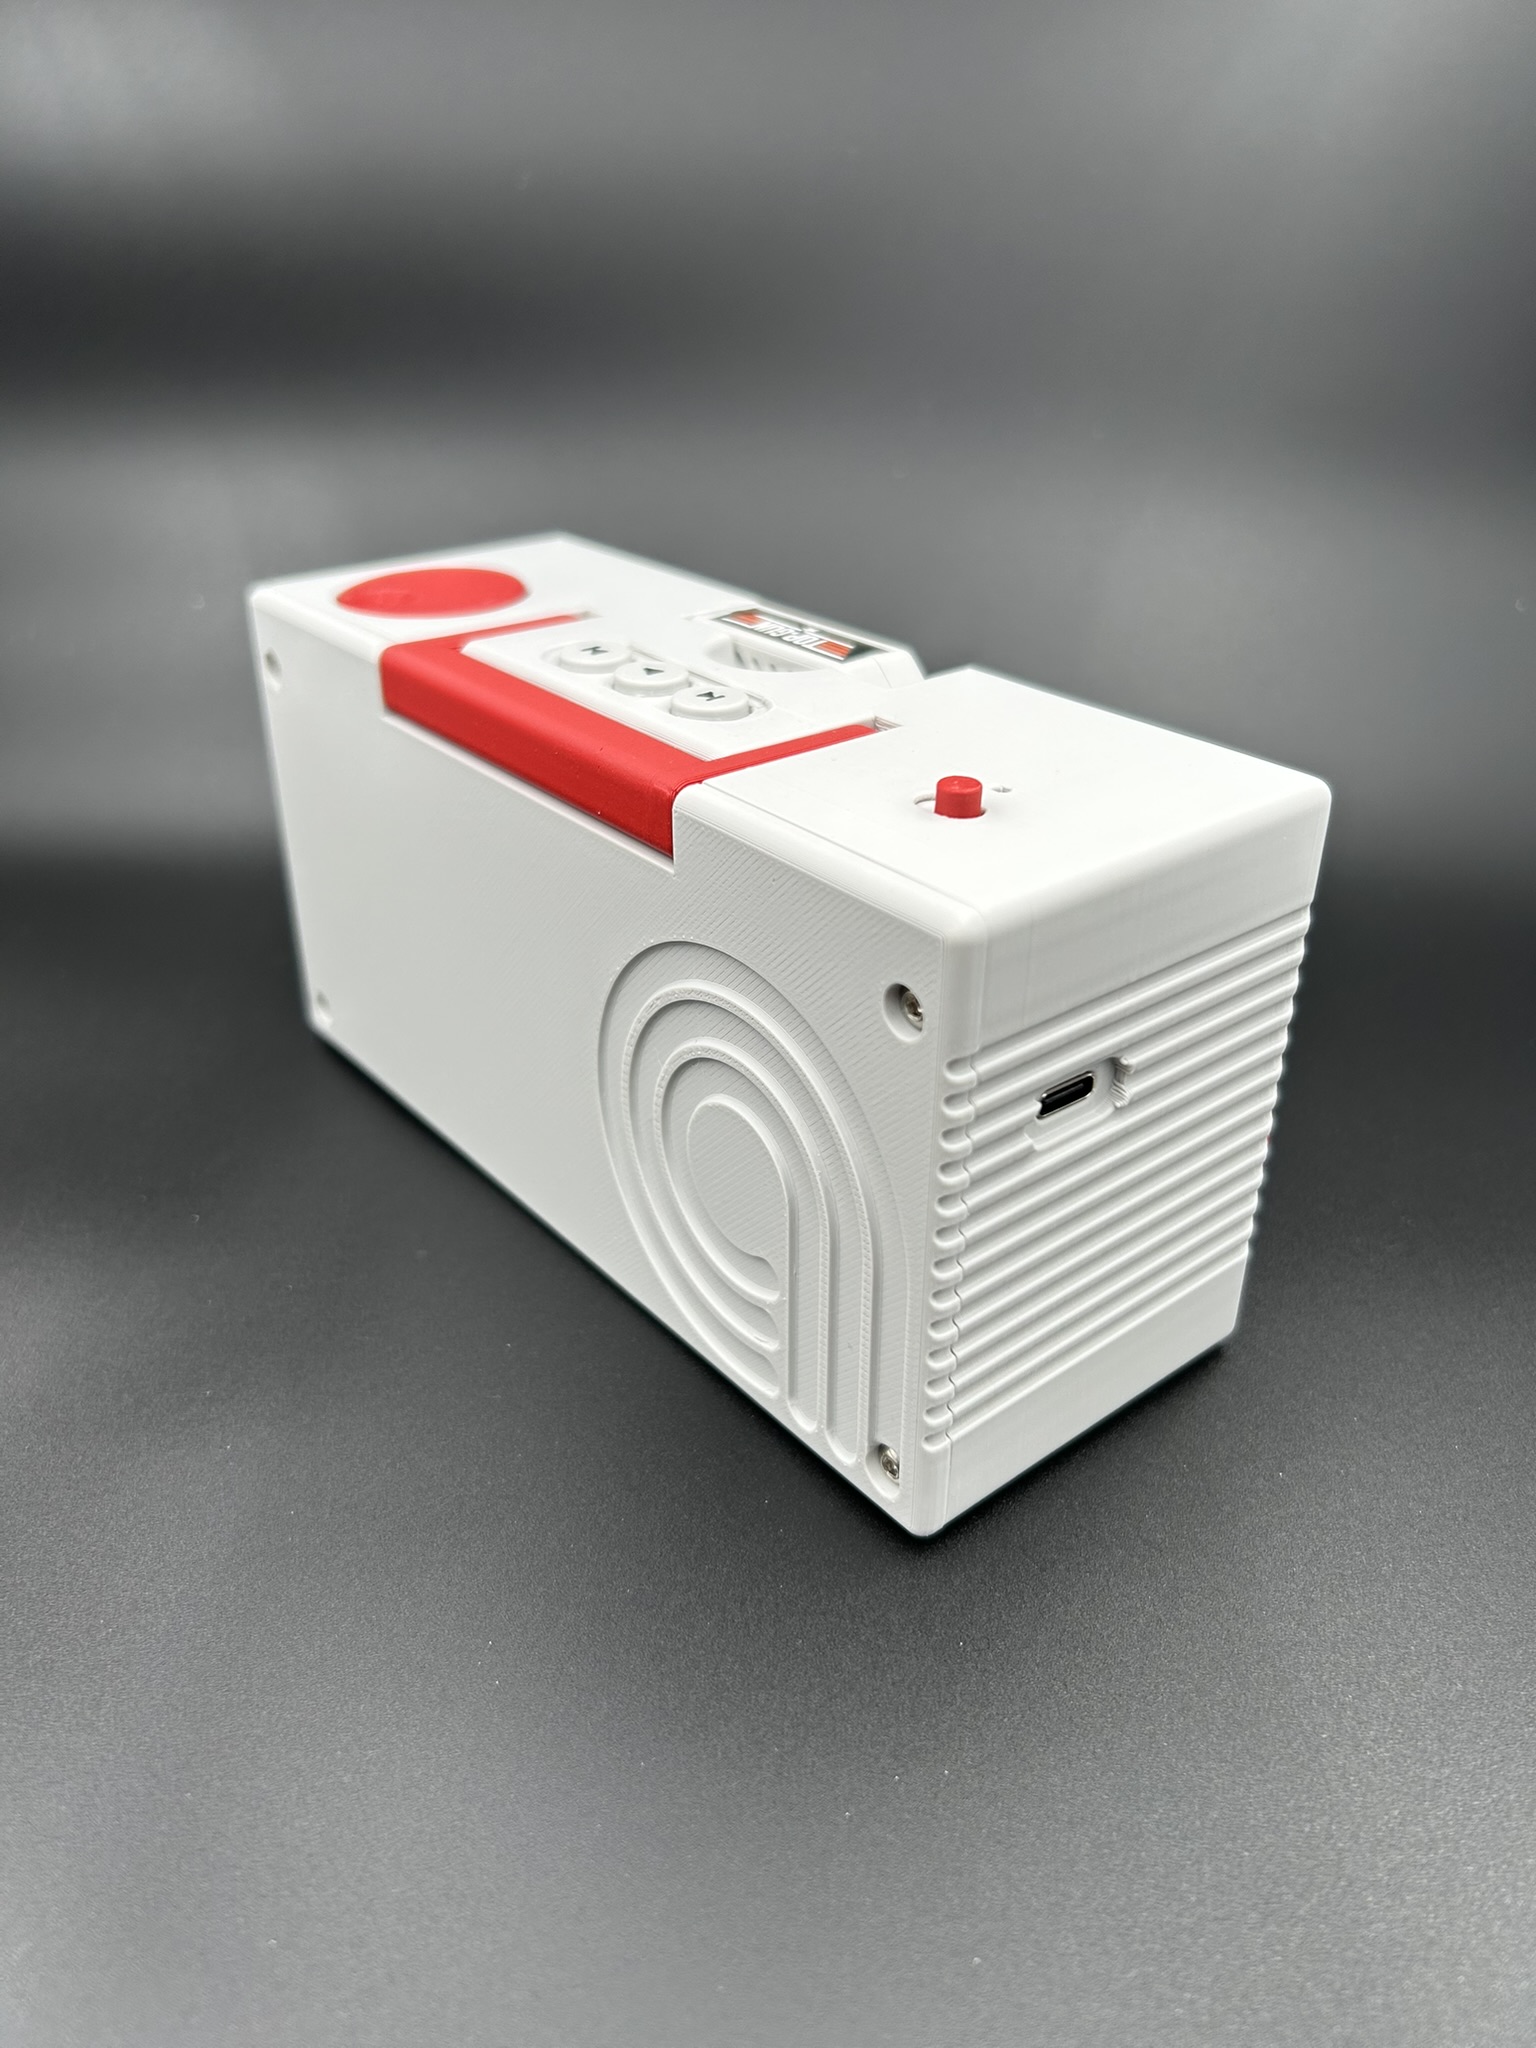
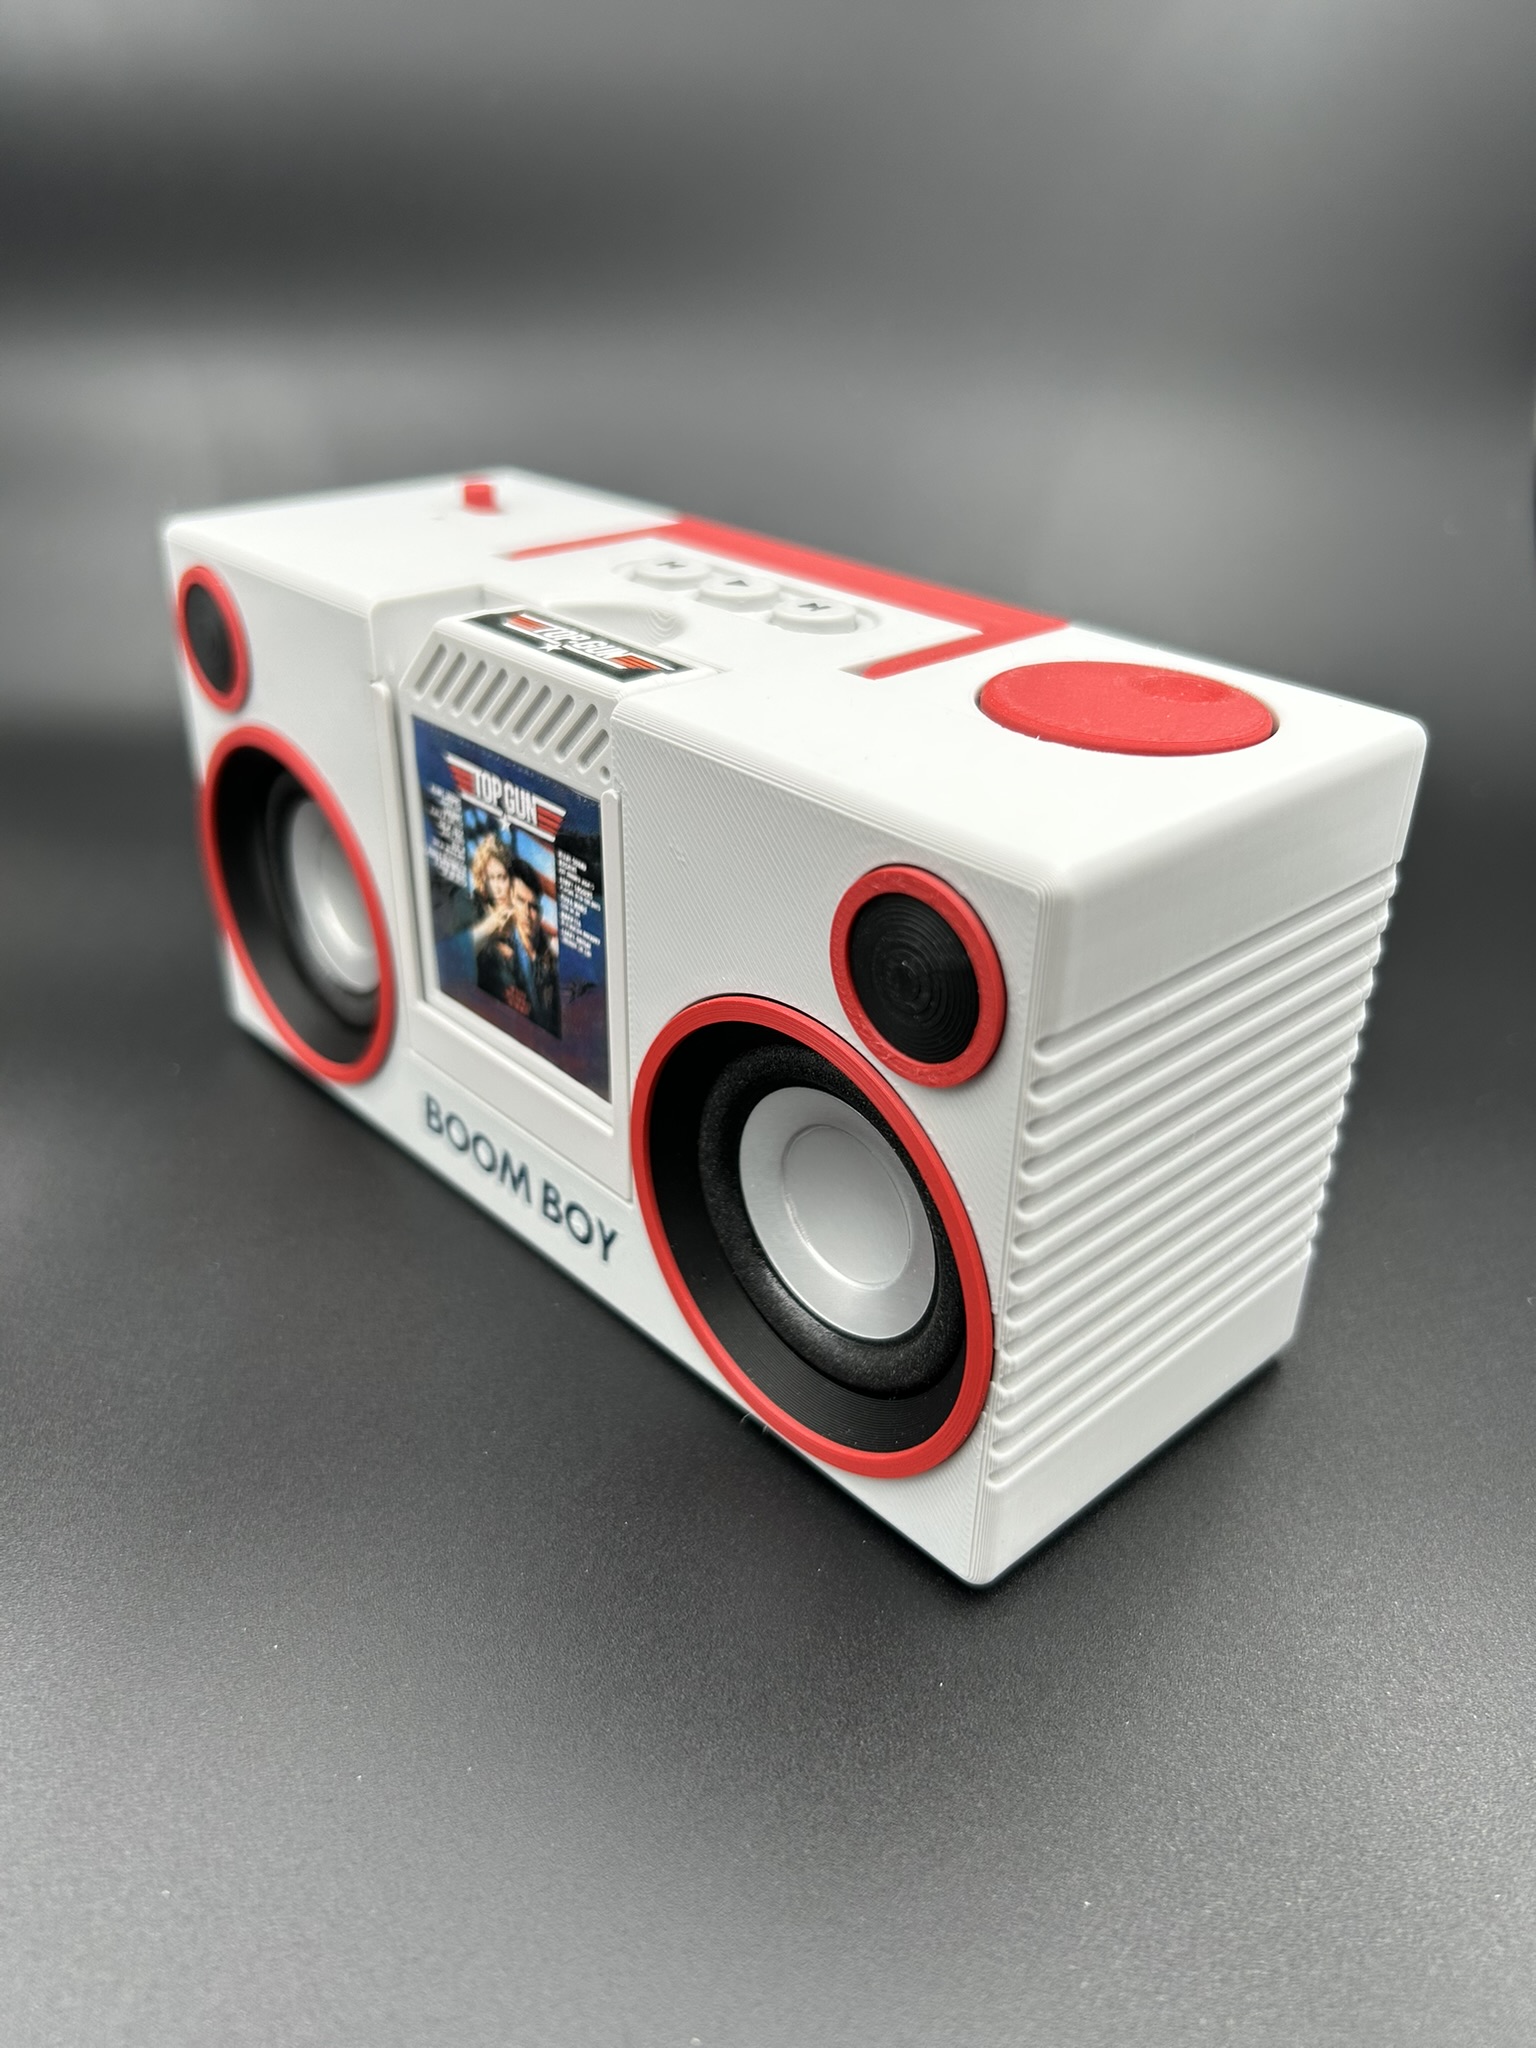
It combines some of the Gameboy aesthetics with a modern and clean look, with most non-essentials stripped away. There’s a power button with an RGB LED that indicates playback status, Prev/Play/Next buttons for selecting and playing tracks, and a rotating volume knob. On the left side, there is a USB-C connector that connects directly to the microcontroller inside, useful for charging the battery and uploading new software.
Speaking of the micro controller, this time I chose an ESP32-S3 based board. For the previous game controller project I used the Arduino Pro Micro, which was easy to use and did the job. But it was also quite expensive and not very powerful. For this project I wanted a more powerful CPU and some built in battery management. I found the Unexpected Maker FeatherS3D, based on a Dual Core 240 MHz CPU with lots of onboard memory and battery charging circuitry, all for $22:
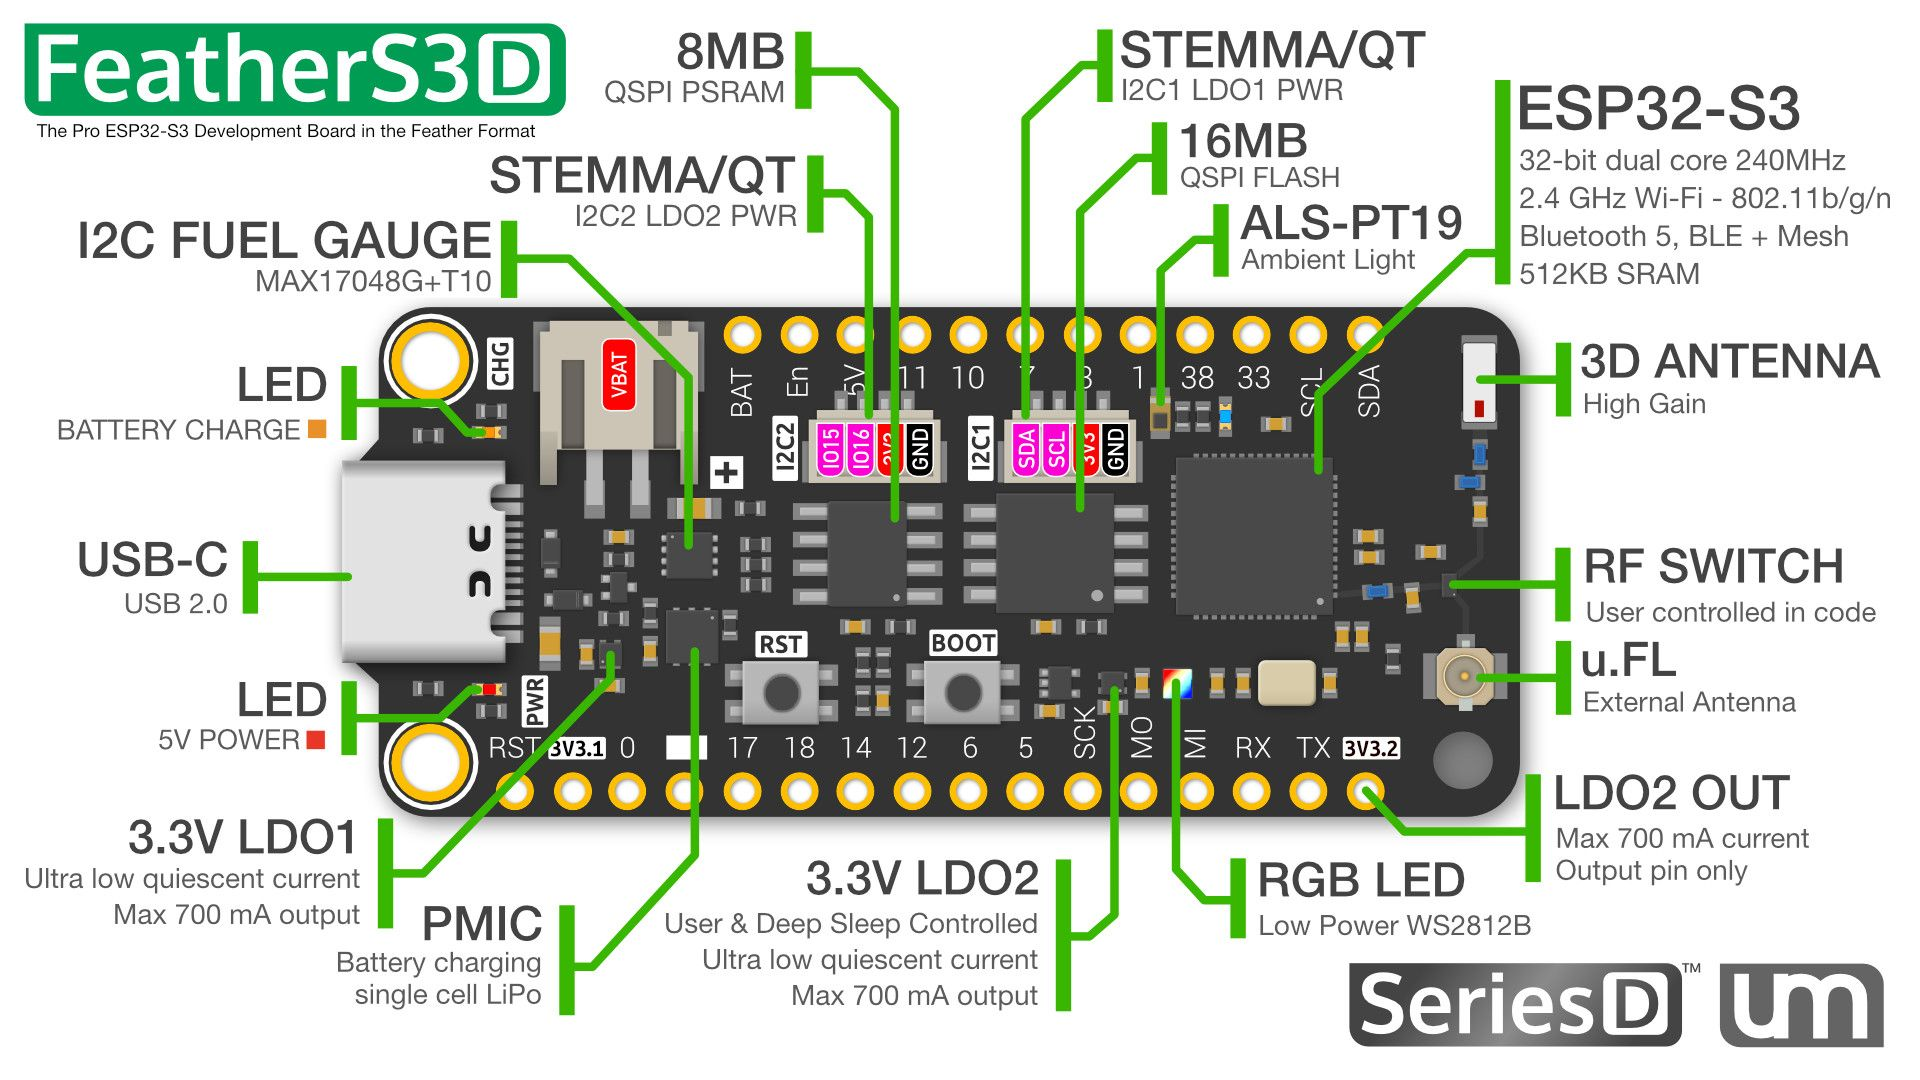
This board has been a joy to work with and the documentation of pinouts etc is great on Unexpected Maker’s site. The power of the CPU means streaming data from an SD card and decoding the mp3 data stream before sending it to the DAC and amplifier was a breeze.
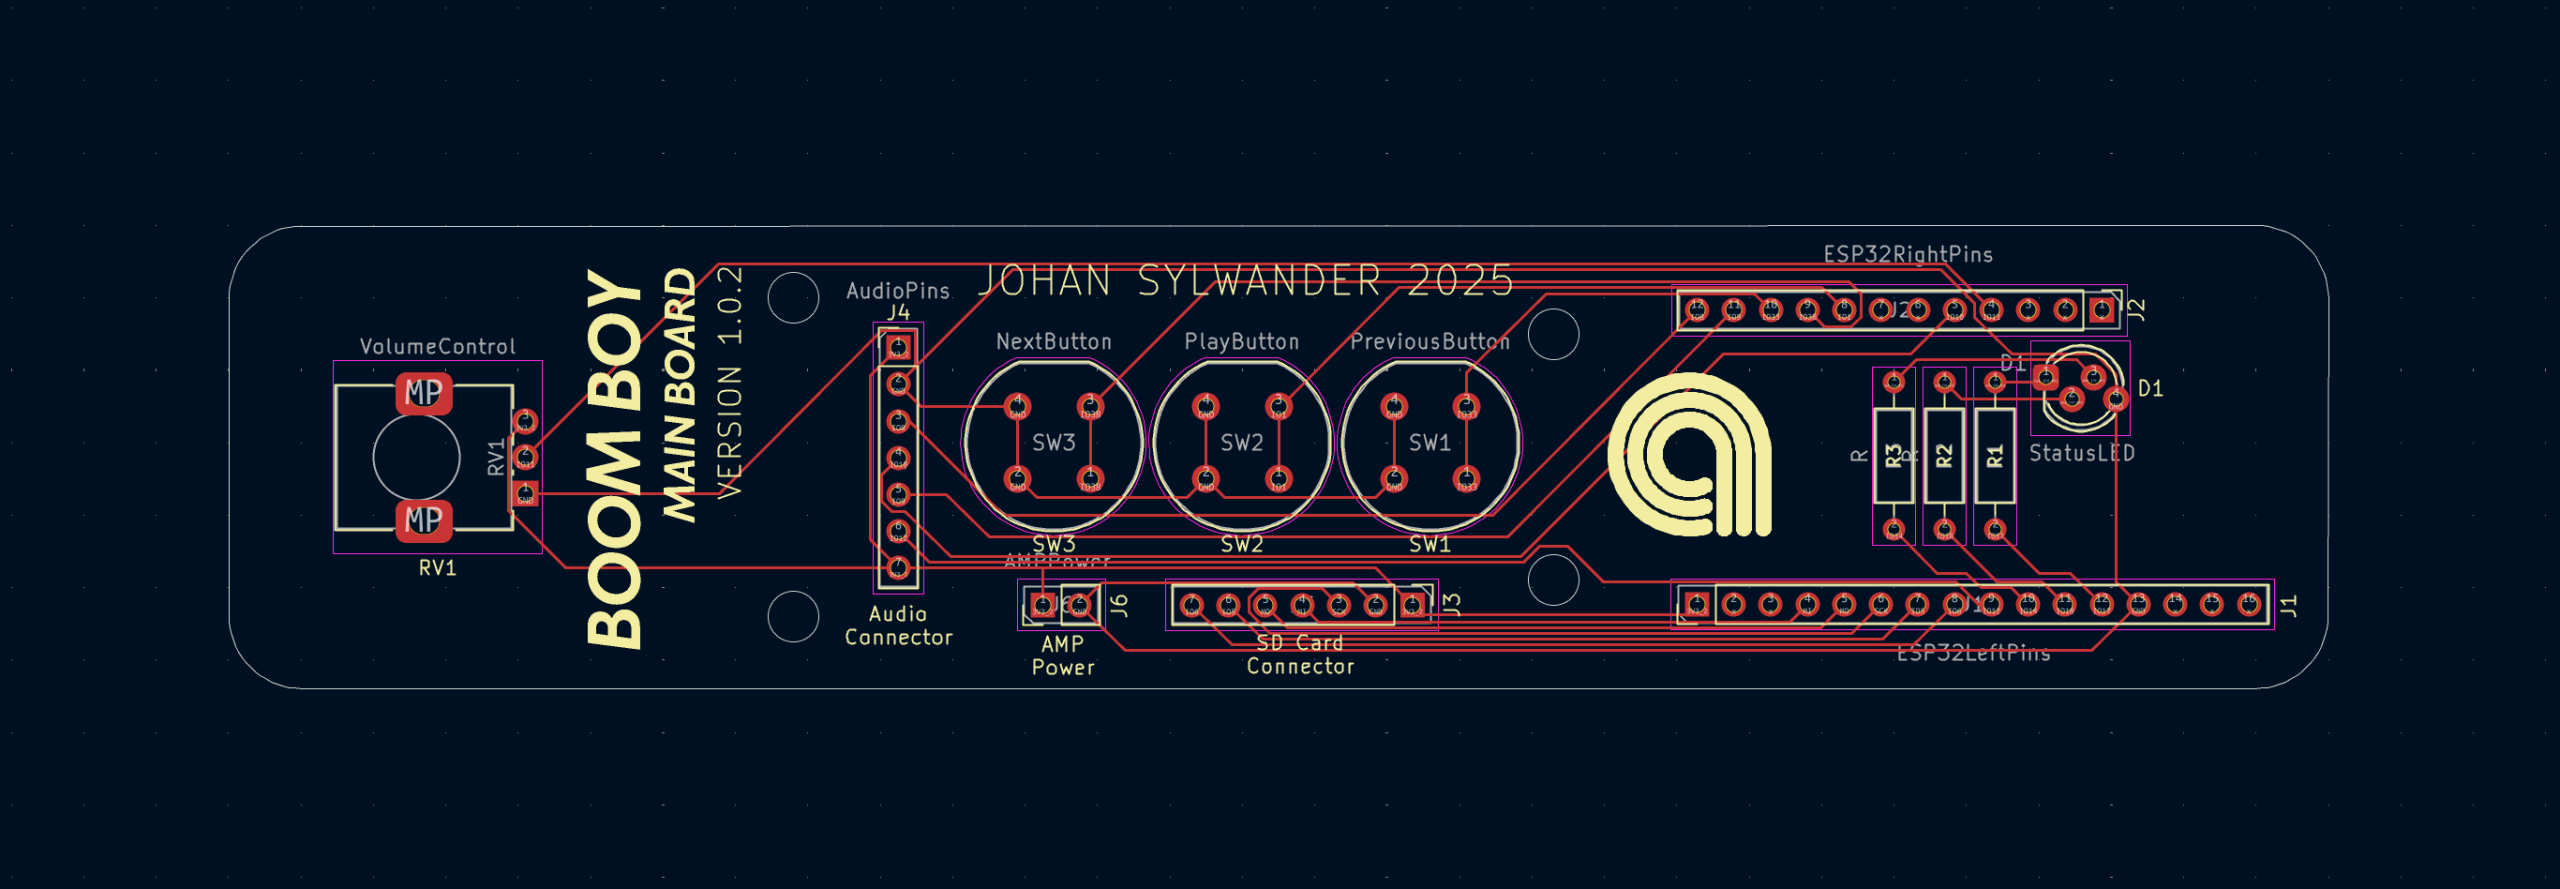
The design of the PCB inside BoomBoy is quite simple, with just a few buttons, the potentiometer for volume, connectors for the DAC and SD card reader, the RBG LED and finally the UM Feather S3D. The UM board is mounted upside down on the PCB to save space.
For software I used the Arduino Audio Tools by Phil Schatzmann, an audio library that was easy to use and worked well with the ESP32-S3 board.
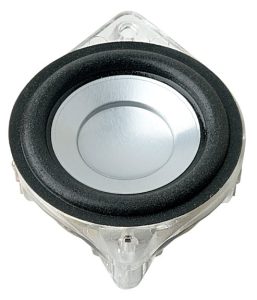
The speaker elements I ended up using was a pair of Visaton BF 45 / 4ohm since they had “balanced frequency response and very good bass reproduction”. The sound they produce is very good for their size, but one can’t expect too much base out of speakers this small. Having never built speakers before, I was unsure of how to design the cabinet so it produces the best sound possible. In the end I went for a simple approach that was mostly based on having quite thick walls for the BoomBoy case, so it acts as a stable mounting platform for the speakers and doesn’t vibrate too much.
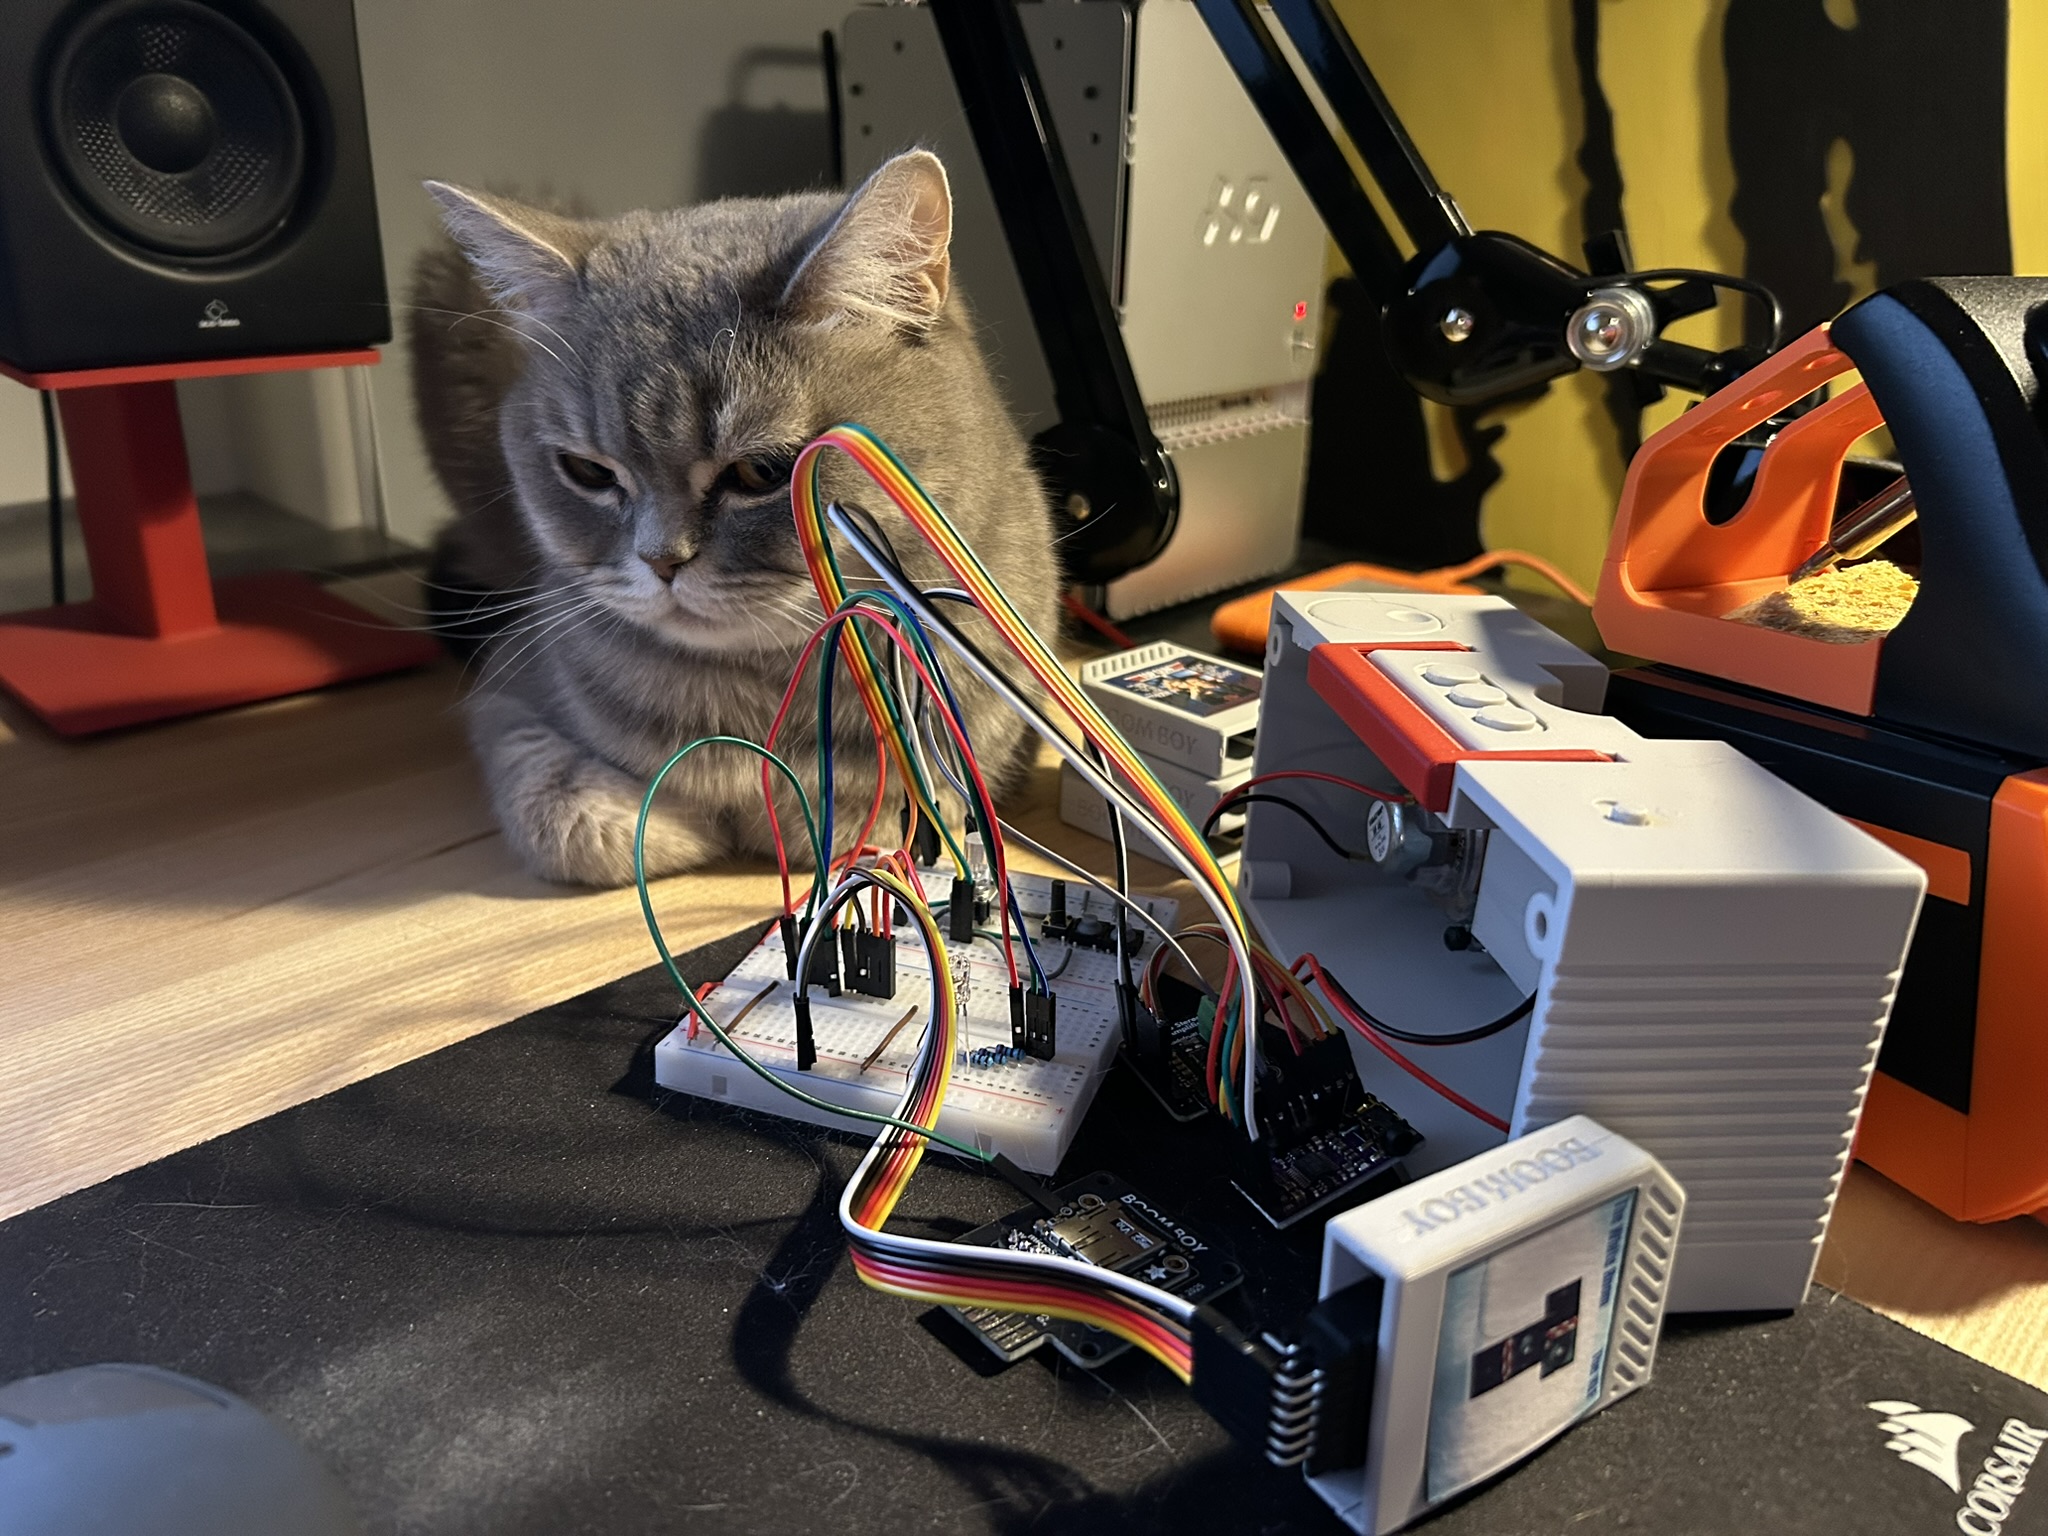
Prototyping this hardware on a breadboard was quite difficult, since it’s easy to get dodgy connections and signal interference between components. As you can see in the picture below, I got some help from my cat Emmylou to debug hardware issues.
Some other components used are: an Adafruit Stereo 3.7W Class D MAX98306 Amplifier, a PCM5102 DAC, a 3.7V 2000mAh LiPo battery and an Alps Alpine RK09D 10kΩ Potentiometer. Here’s a photo of all components (minus the UM Feather S3D) laid out before assembly:
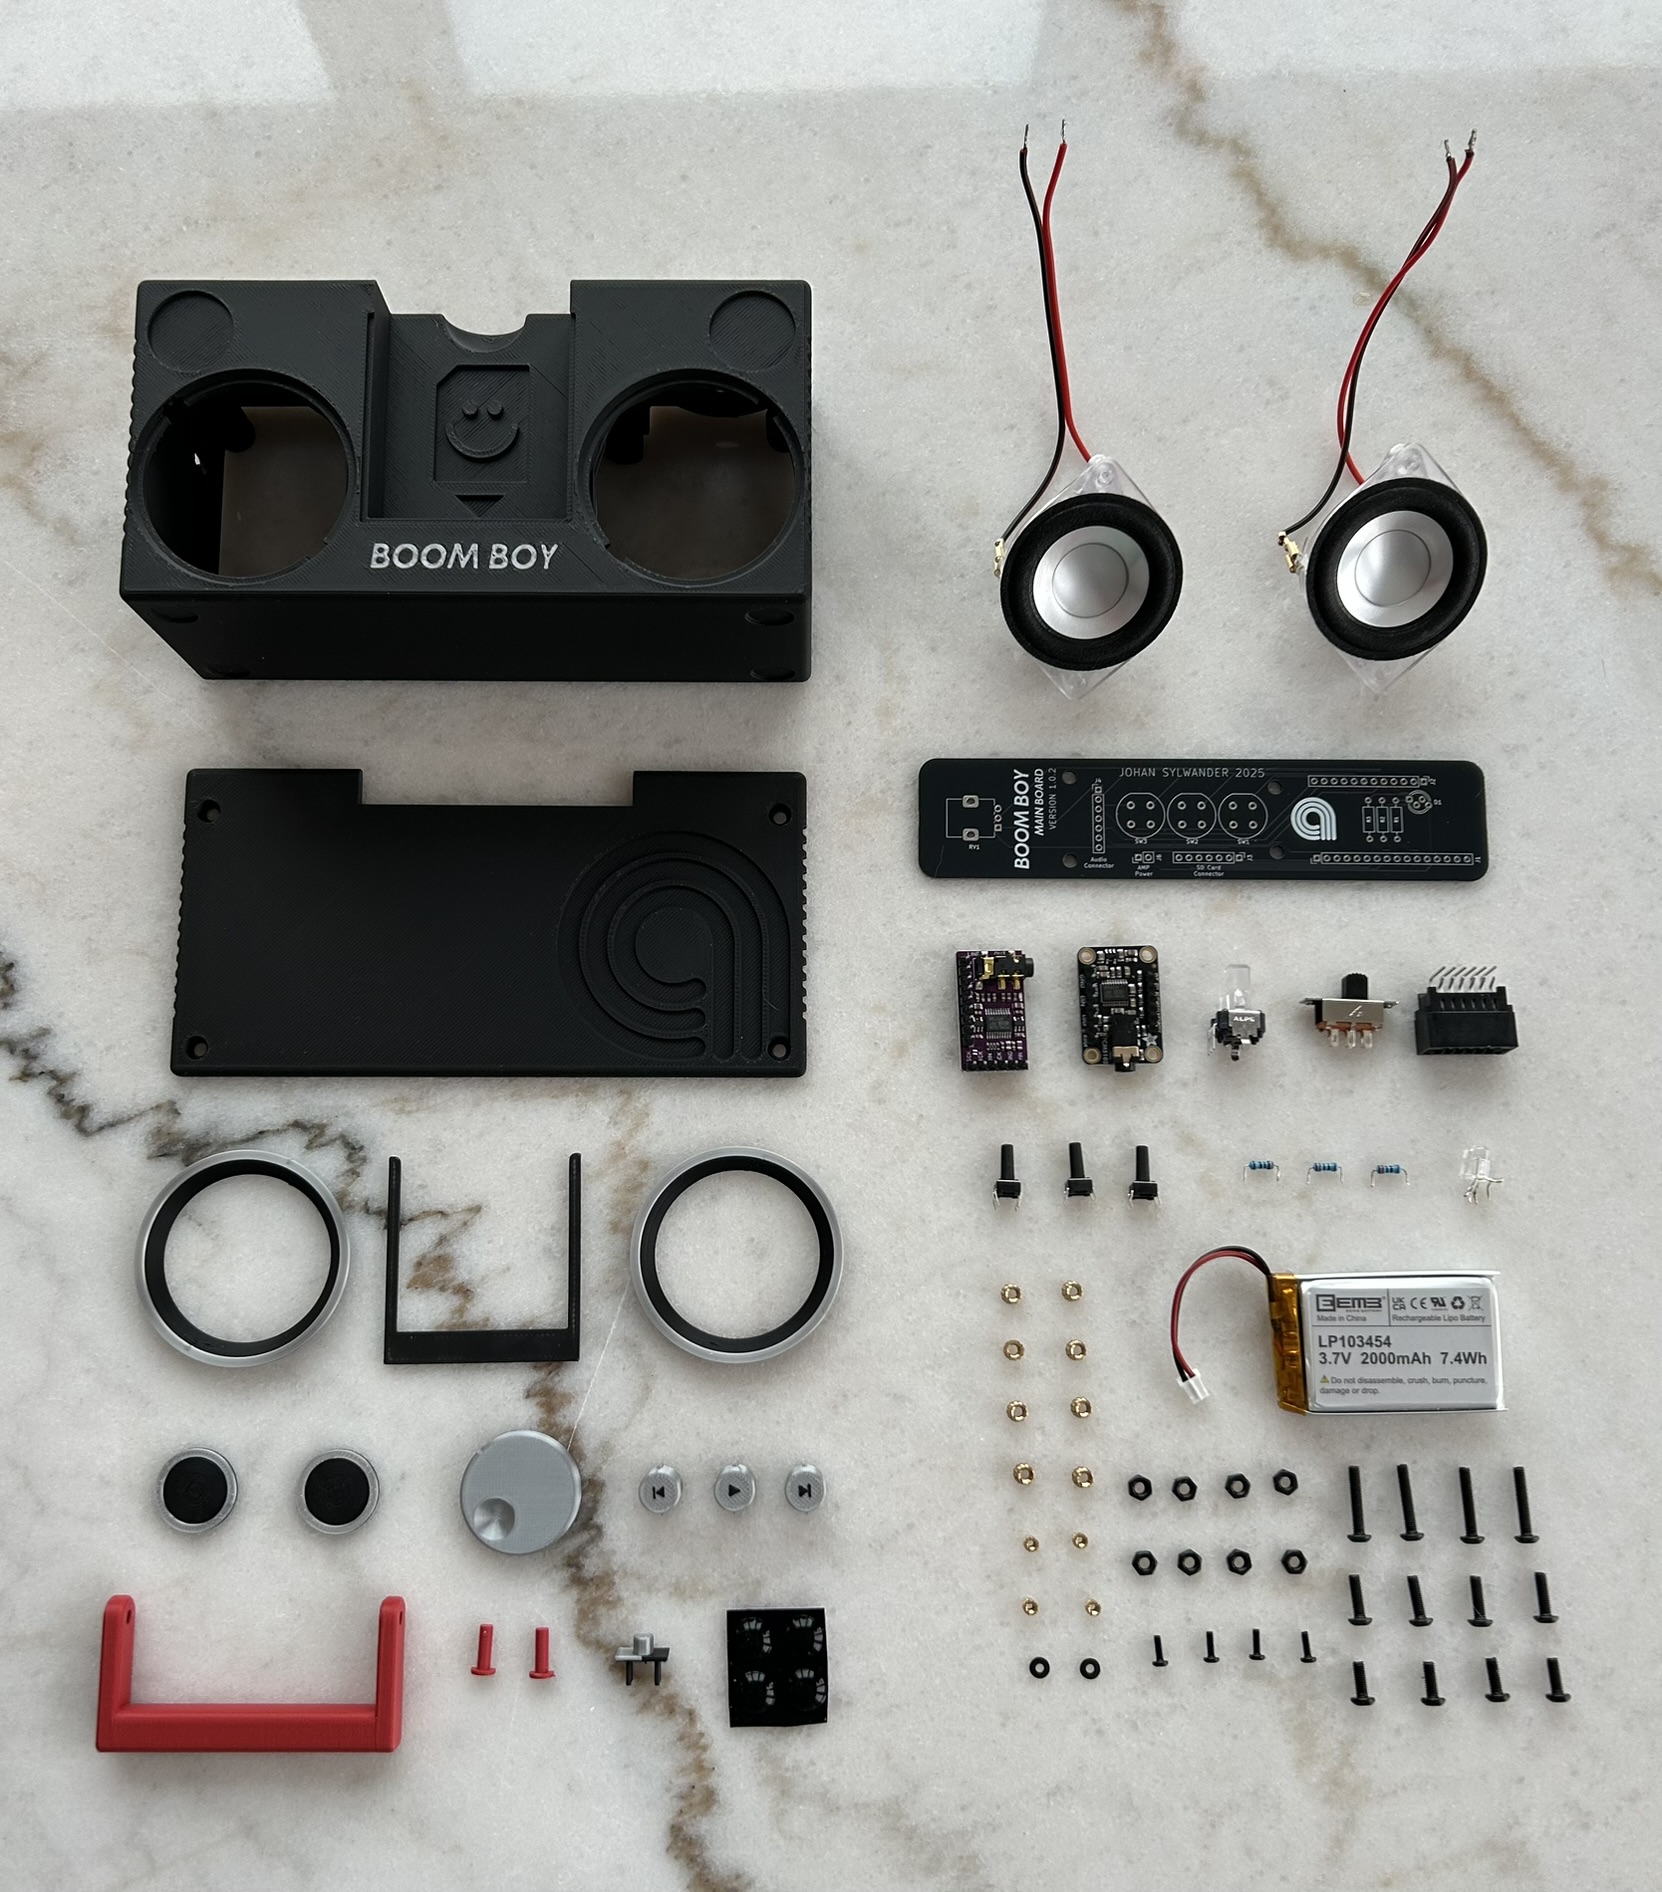
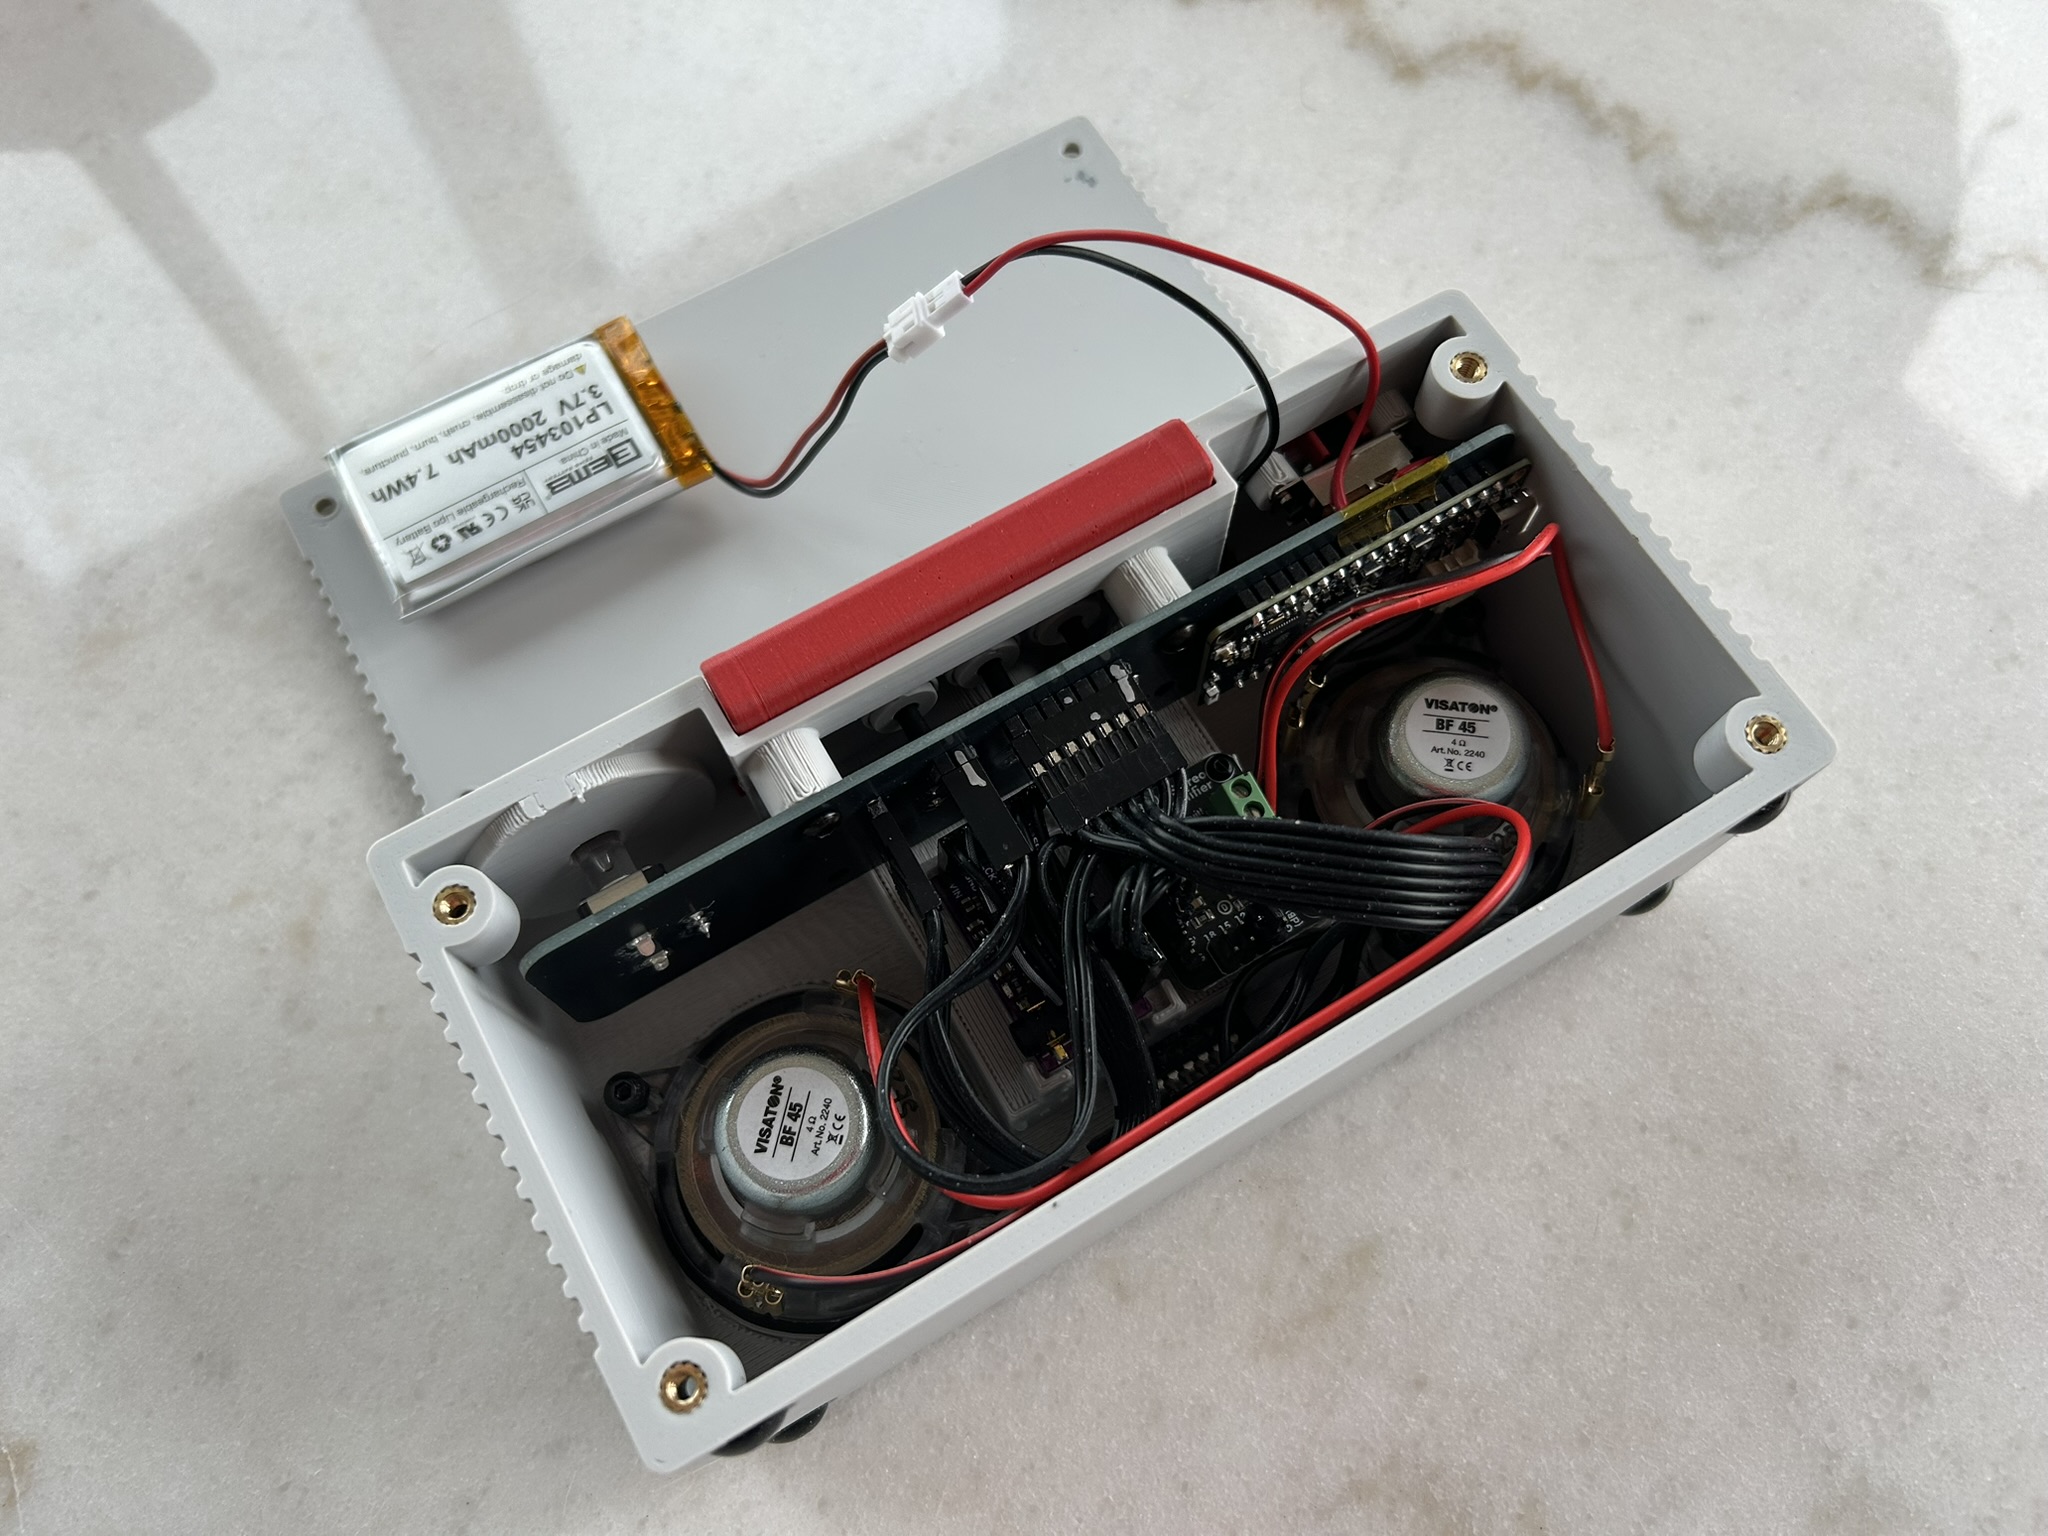
These parts are for the black version of the BoomBoy, which has silver and red accents. The original version has a gray case with red and black accents. All parts of the case were printed in Bambu Lab PLA. I assembled all parts and attached the battery to the lid with a double sided foam sticker. This is what the inside of the case looks like:
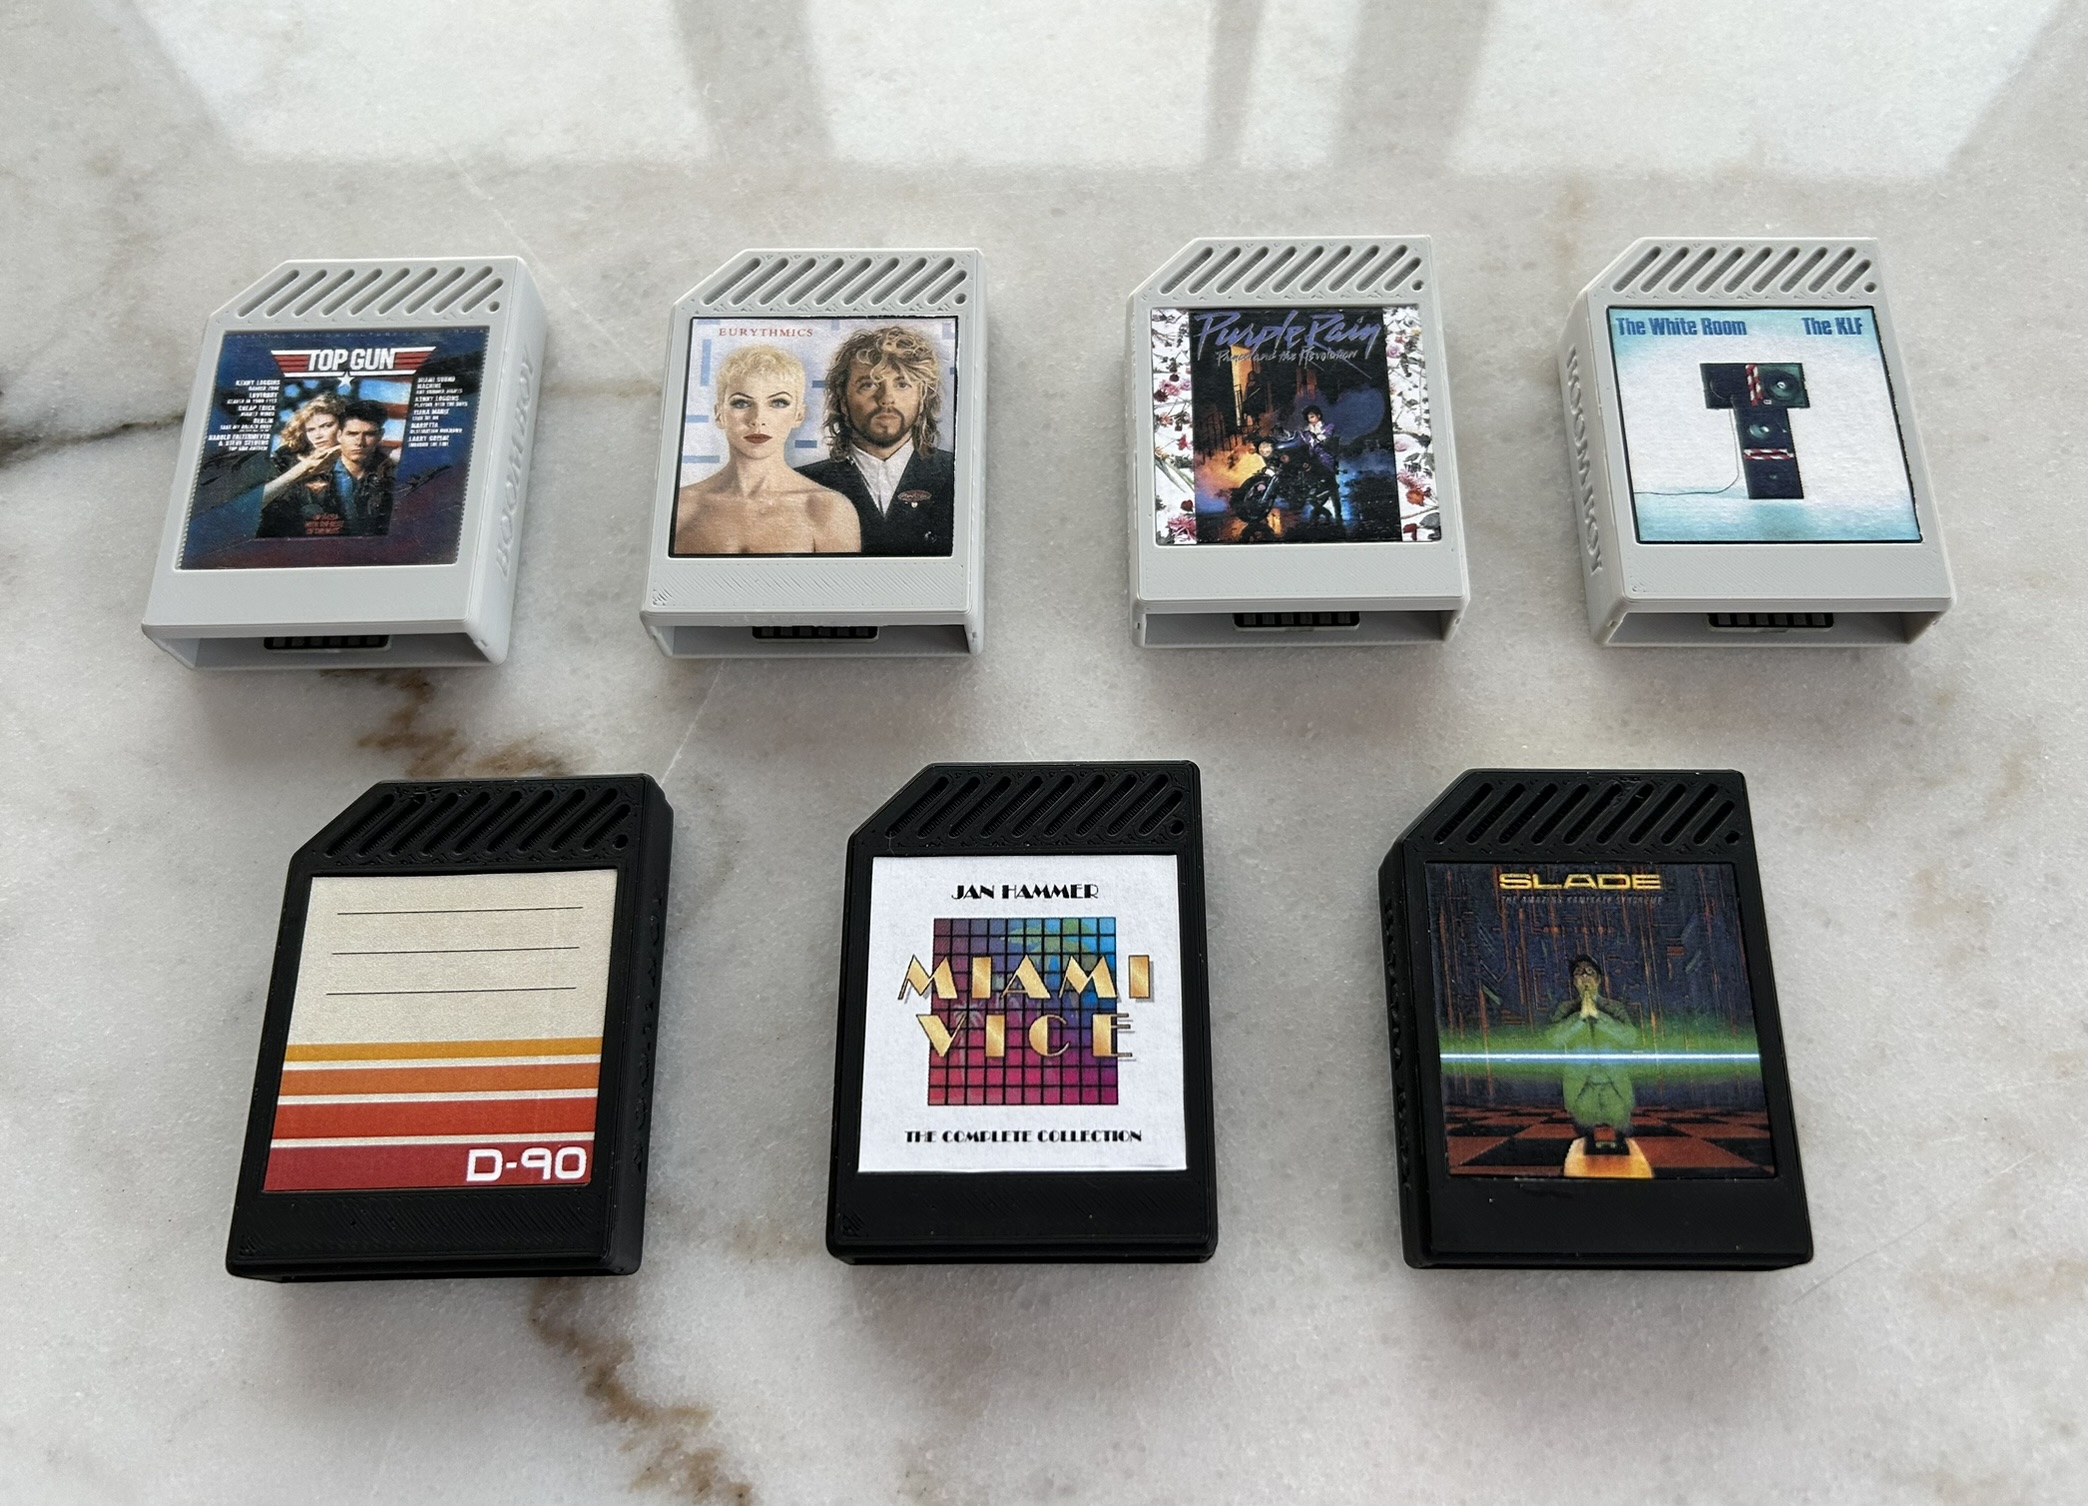
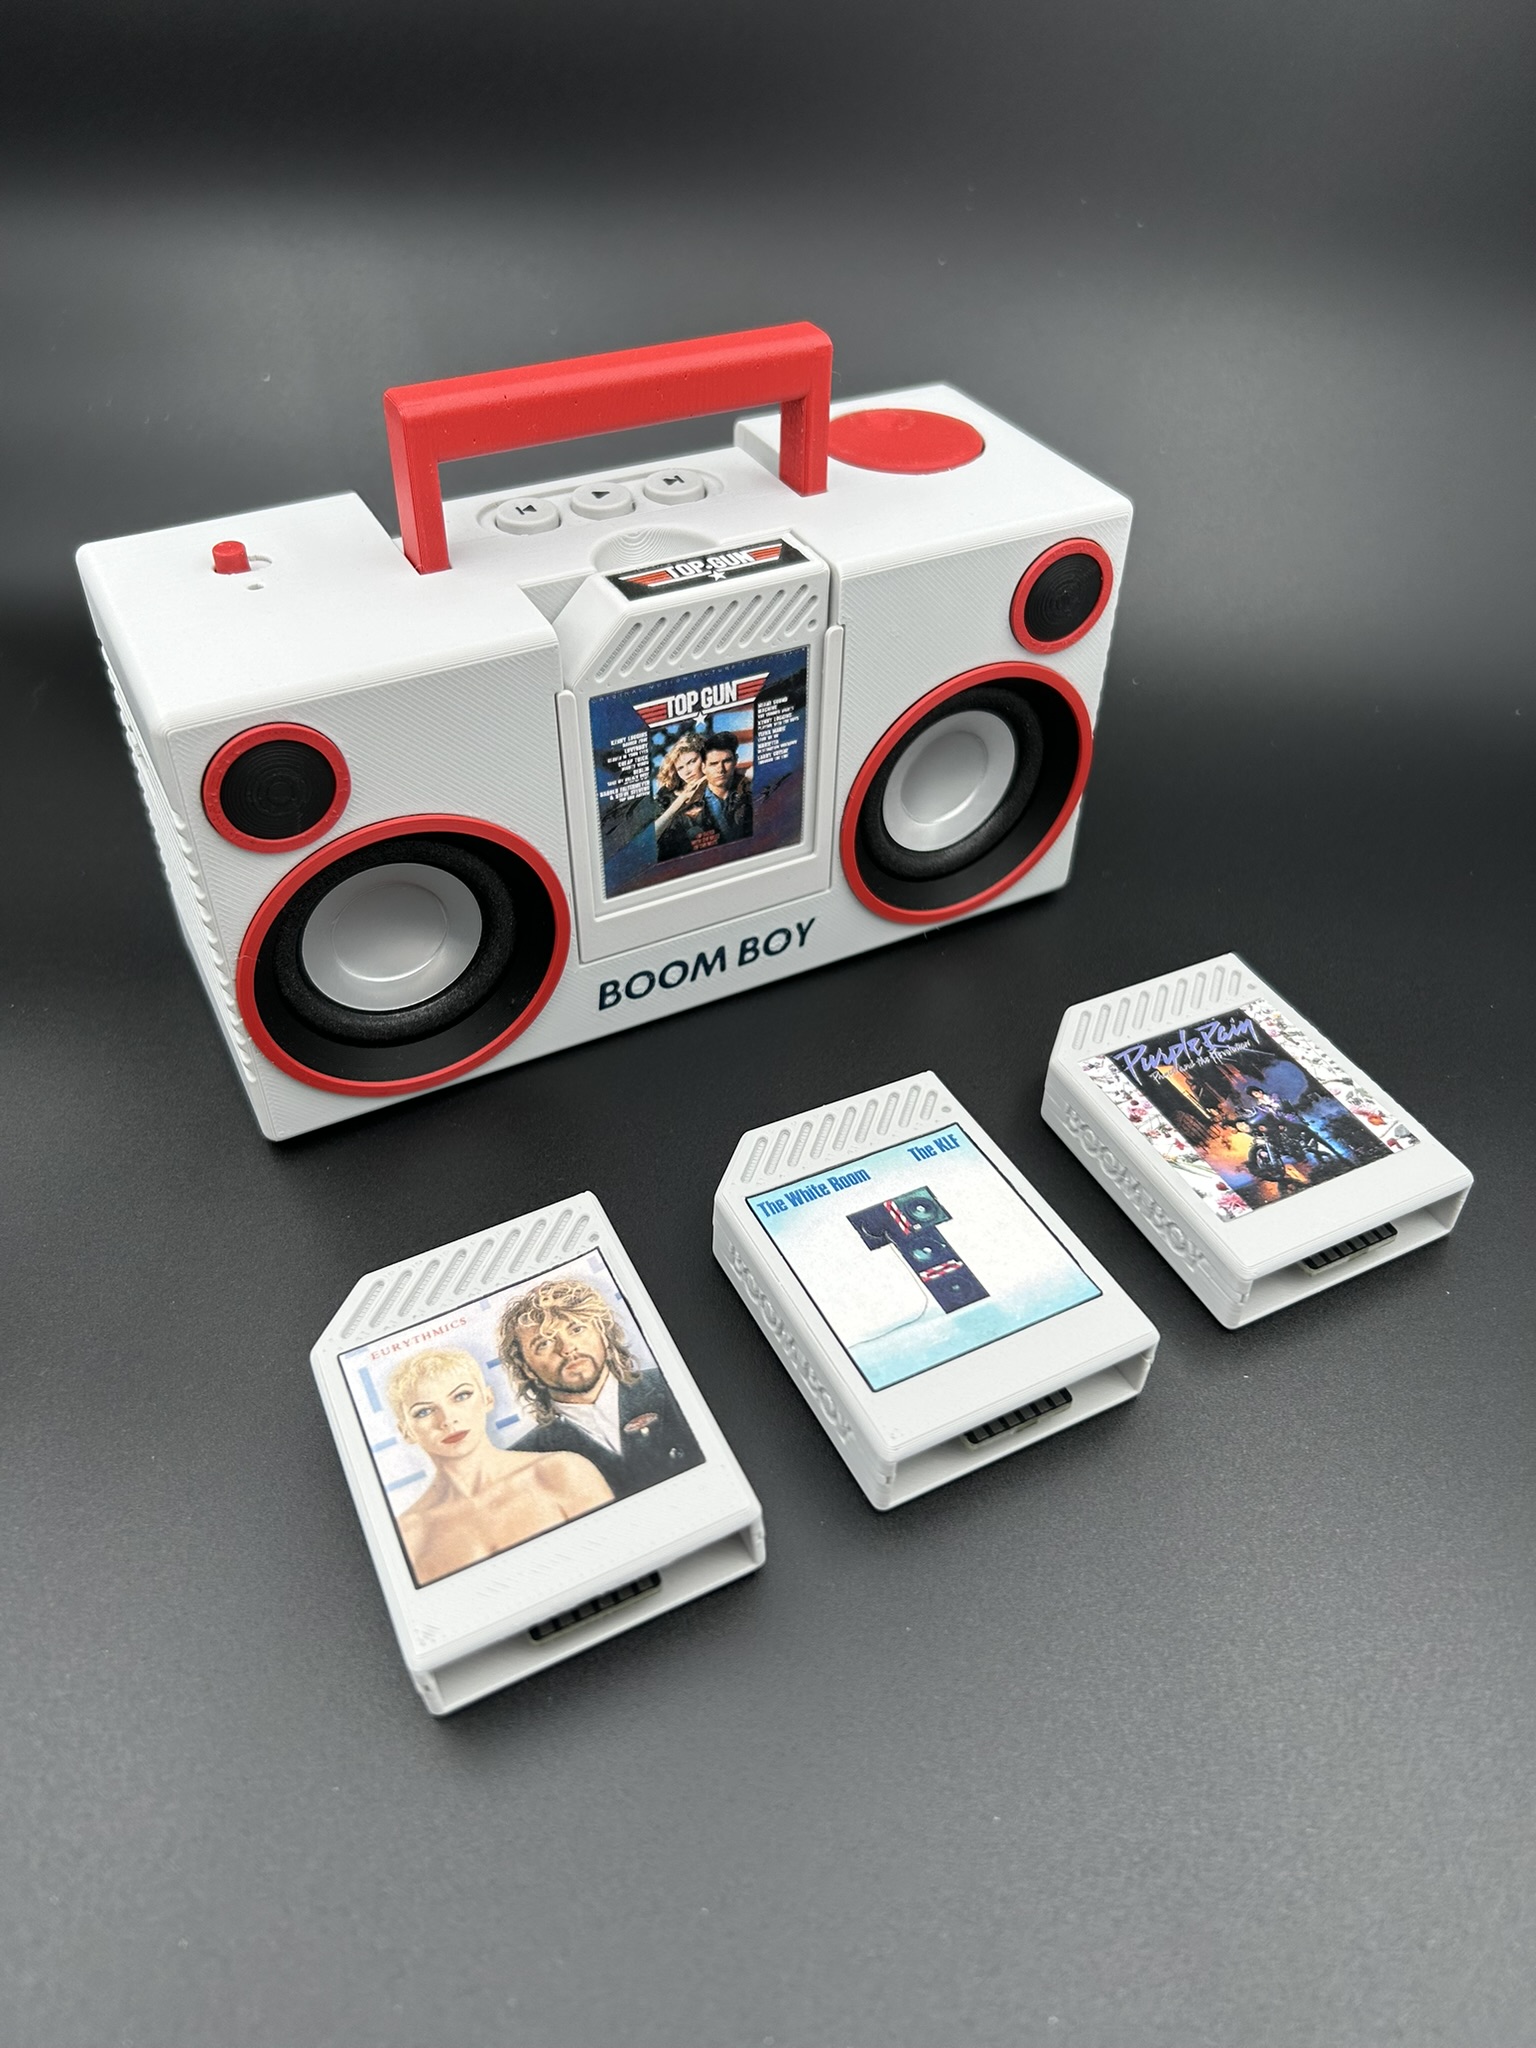
I made a few cartridges in gray and black PLA with classic 80s albums and printed labels for them, as well as a blank cartridge for recording your own “mix tape”.
Here’s a picture of the finished Boom Boy and its cartridges:
I also took a few pictures of these prodcuts in a small light box/photo tent, which gives very crisp and bright images, but I’m not quite sure if I actually like these pictures. The tend to show more of the 3D printing artefacts and make colors seem a bit too bright.
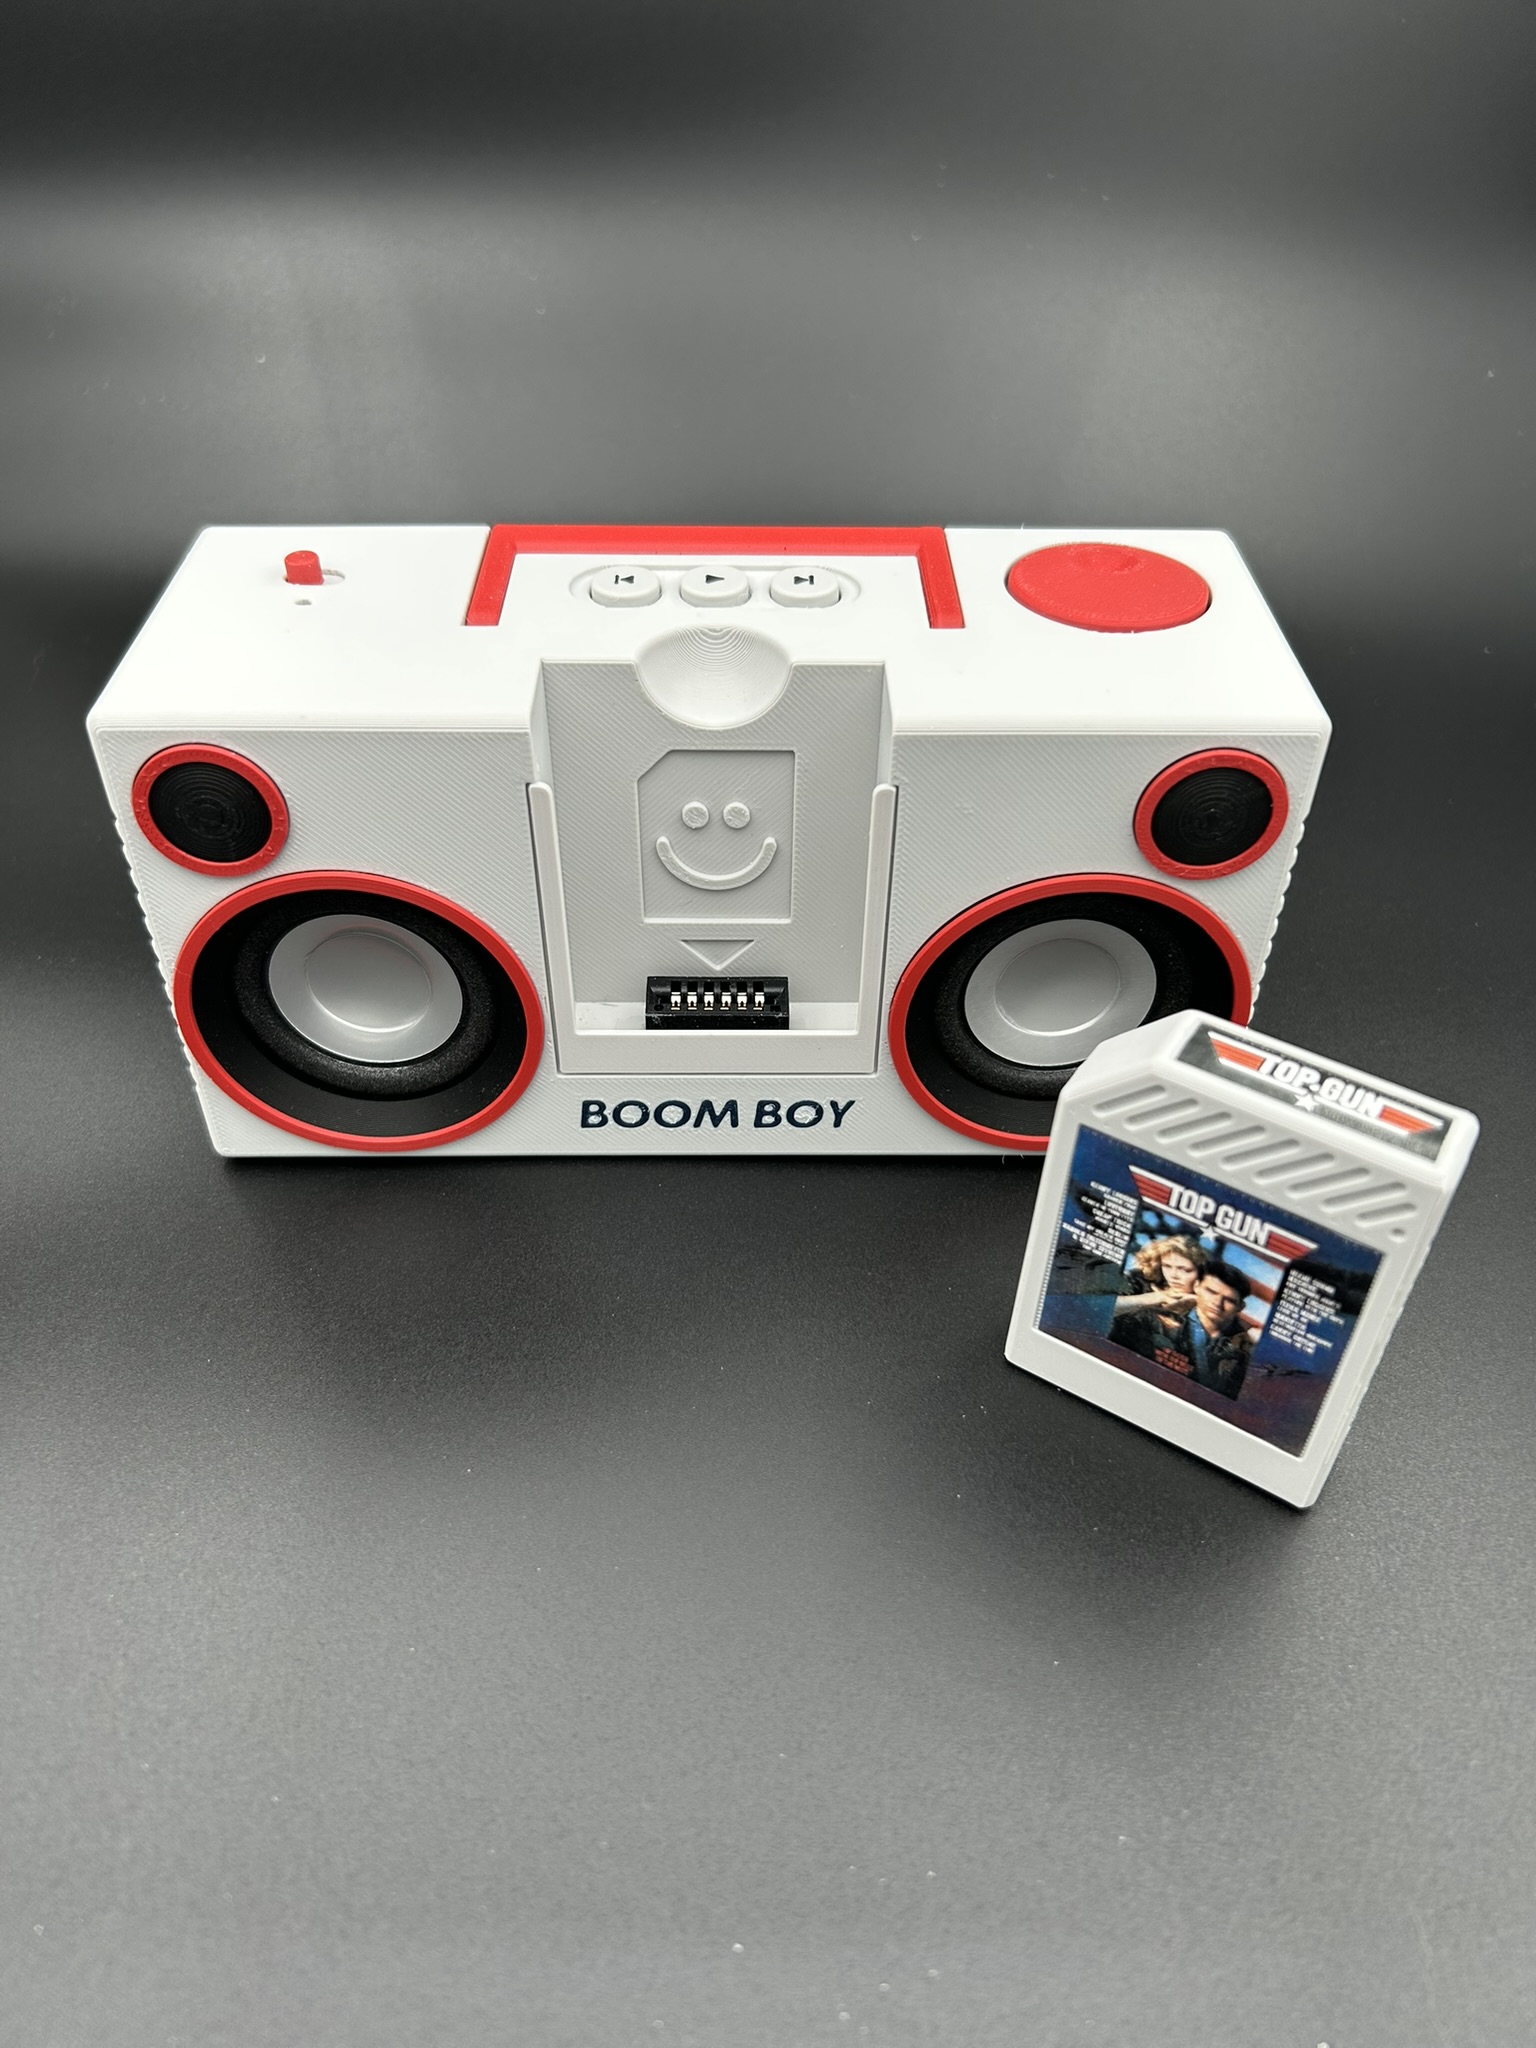
This project was incredibly fun and it taught me so much about programming an ESP32 micro controller an designing PCBs. One take away is to strive for simplicity in the hardware design for coming projects. For instance, attaching all components to the same PCB if possible, since solder joints are much more reliable than wired connections.
You could easily take this project further by making the Boom Boy a bluetooth music player since the ESP32 board already contains bluetooth capabilities. You could also make it networked over Wi-Fi to play internet radio or integrate to a home entertainment system. But I feel done with it for now and will move on to the next design idea.


Leave a Reply